Birds are some of the most incredibly diverse and beautiful creatures on the planet. Fossil records indicate that modern birds originated around 60 million years ago. Since then nature has created a huge variety of colorful, fascinating, and awe-inspiring birds and many of us, myself included, love to photograph them.
Bird photography is a type of wildlife photography specifically associated with photographing birds. Bird photographers use cameras with fast shutter speeds, good low-light performance, and image resolution, as well as zoom lenses to photograph birds from a distance without affecting their behavior.
Continue reading to find out more about bird photography and the equipment used to do it. There is so much more to bird photography than simply pointing a camera at a bird and clicking off a shot. I’ll discuss some of the skills and techniques in the article also.

As an Amazon Associate, I earn from qualifying purchases. Birdwatch World earns commissions from Amazon and similar affiliate programs from any purchases made via links in this article.
When Was The First Picture Of A Bird Taken?
It is not known when the first successful photo of a bird was taken. The earliest surviving print of a wild bird is that of a White Stork on its nest, taken by American Charles A. Hewins in 1870. The next oldest is a photo of Rockhopper Penguins from the Challenger Expedition in 1872.
Around 1882, during a scientific study of birds in flight E. J. Marey invented the photographic gun. Literally modeled from a gun, this chronophotographic camera was invented to capture the motion of free-flying birds. Based on the photo revolver (invented in 1874) by French astronomer Jules Janssen, this camera would capture 12 successive images each with an exposure of 1/720th (1/1500th in good light) of a second whenever the trigger was pulled.
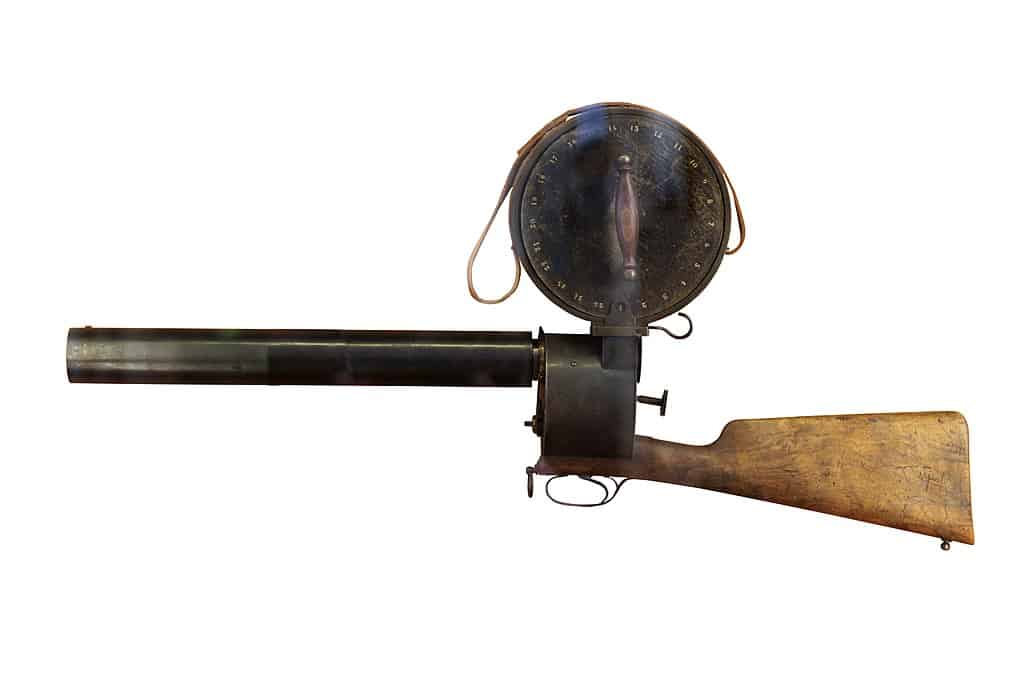
The lens of this photographic gun was in the barrel and would move back and forth to allow focusing. With this ingenious device, Marey was able to capture significant features of birds in flight such as the twisting of their feathers due to wind pressure.
How Do You Start Bird Photography?
As a general rule, to start bird photography you will need a camera capable of shutter speeds above 1/1500 of a second. A telephoto lens with a zoom greater than or equal to 200mm is also needed. Stationary birds are a good first subject as they are easier to photograph than birds in flight.
When you first start out with bird photography you may find it difficult, especially if you do not know how to work your camera. This is why I suggest starting with stationary birds. Look for birds that are seated or perched and don’t look as if they will move away.
When you have had enough practice and can successfully take good photos most of the time, you can then move up to the challenge of flying bird photography.
If you are interested in bird photography gear and settings, read this post here on my blog.
So what exactly is a good bird photo? Let’s explore the prerequisites for a good bird photo.
What Makes A Good Bird Photo?
There are many factors that make a good bird photo. Some of these are considered “rules” in the world of photography but rules are always made to be broken. The following is a list of tips (not rules!) that will help to improve your bird photography:
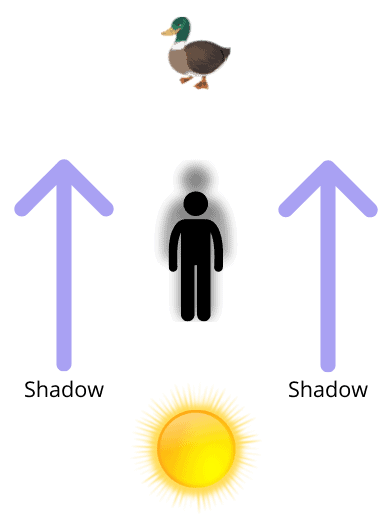
1. Point Your Shadow At The Bird
This is another way of saying “put yourself between the bird and the sun or whatever light source that is illuminating the bird.” This way you make sure that the bird is lit up sufficiently and there are no ugly shadows making the image look flat.
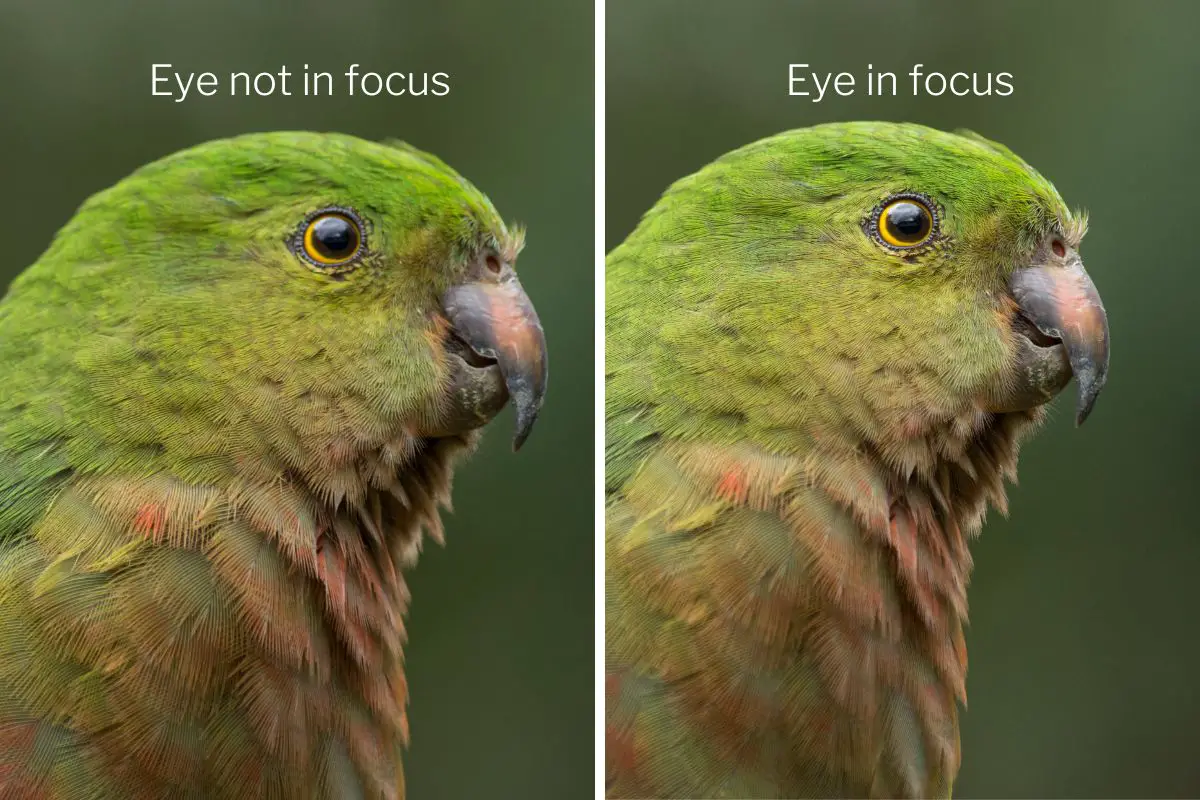
2. Focus On The Eye
This is a rule that is not made to be broken. When we look at a photo of a person or animal we instinctively look at the eyes. If at least one of the eyes is not in focus, then the photo is not going to look good. Always make sure to get both eyes or the eye closest to the camera in focus.
Learn about the focus modes you need for bird photography in this article here on my site.
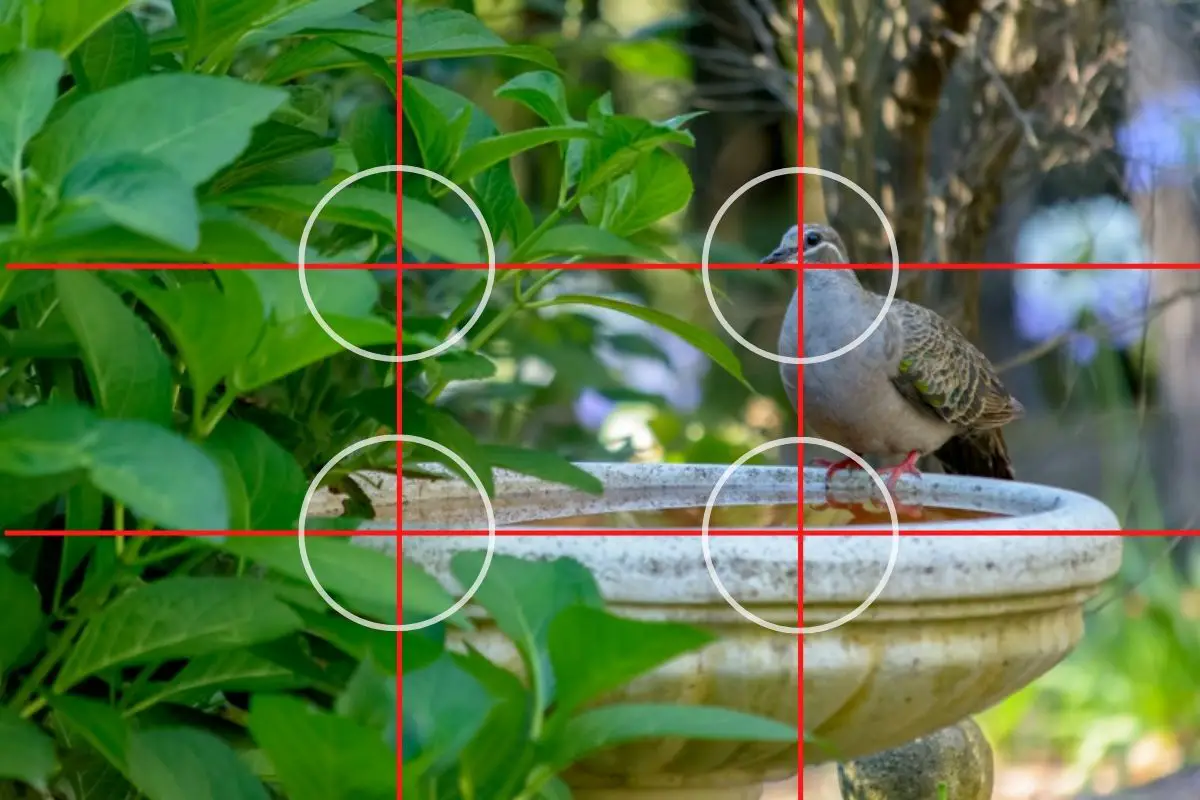
3. Use The Rule Of Thirds
The rule of thirds in photography is used to give space to a photograph and provide interest to the viewer. Basically, the frame is divided up into thirds both horizontally and vertically and the subject (in this case a bird) should be placed on one of those thirds or where they intersect.
This makes a more interesting photo than having the subject in the middle. There are situations where this rule can be broken.
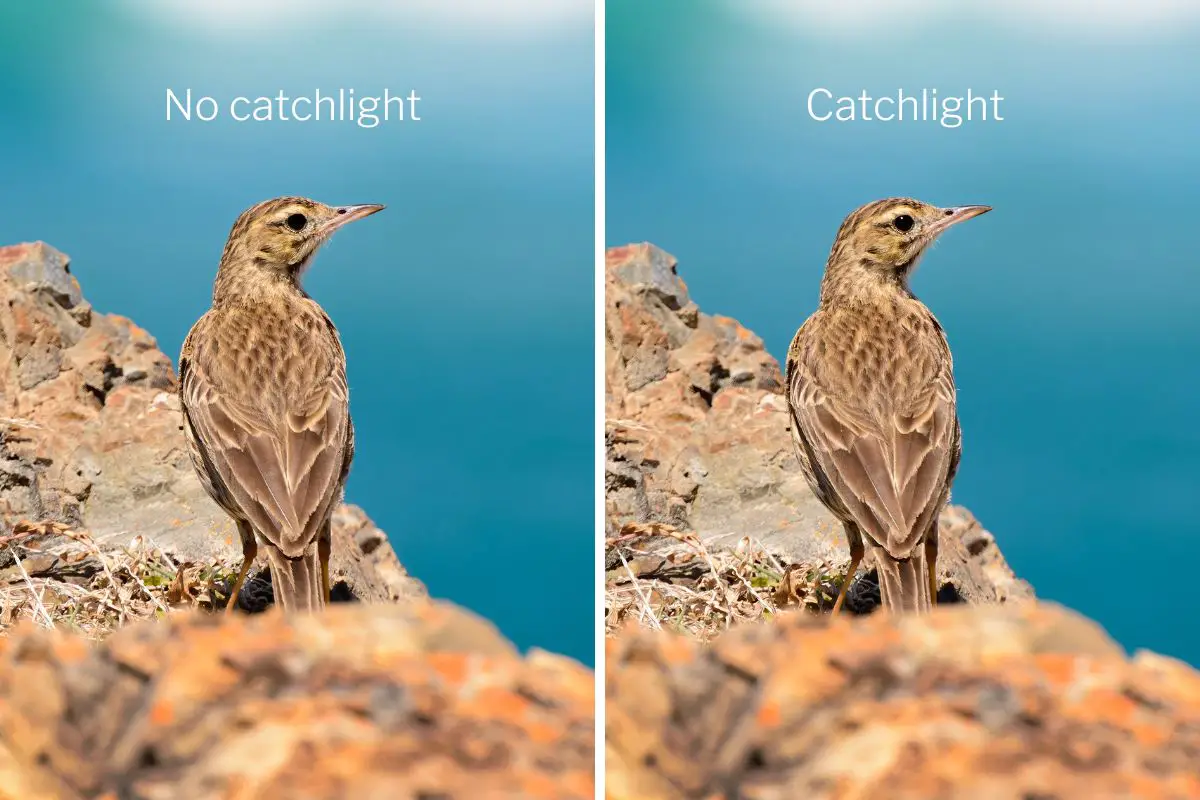
4. Get A Catchlight In The Bird’s Eye
Photos of animals (or humans for that matter) look better if there is light reflected in their eyes. It makes the eyes look more “alive.” This is called a catchlight and is something you should aim for in your bird photos.
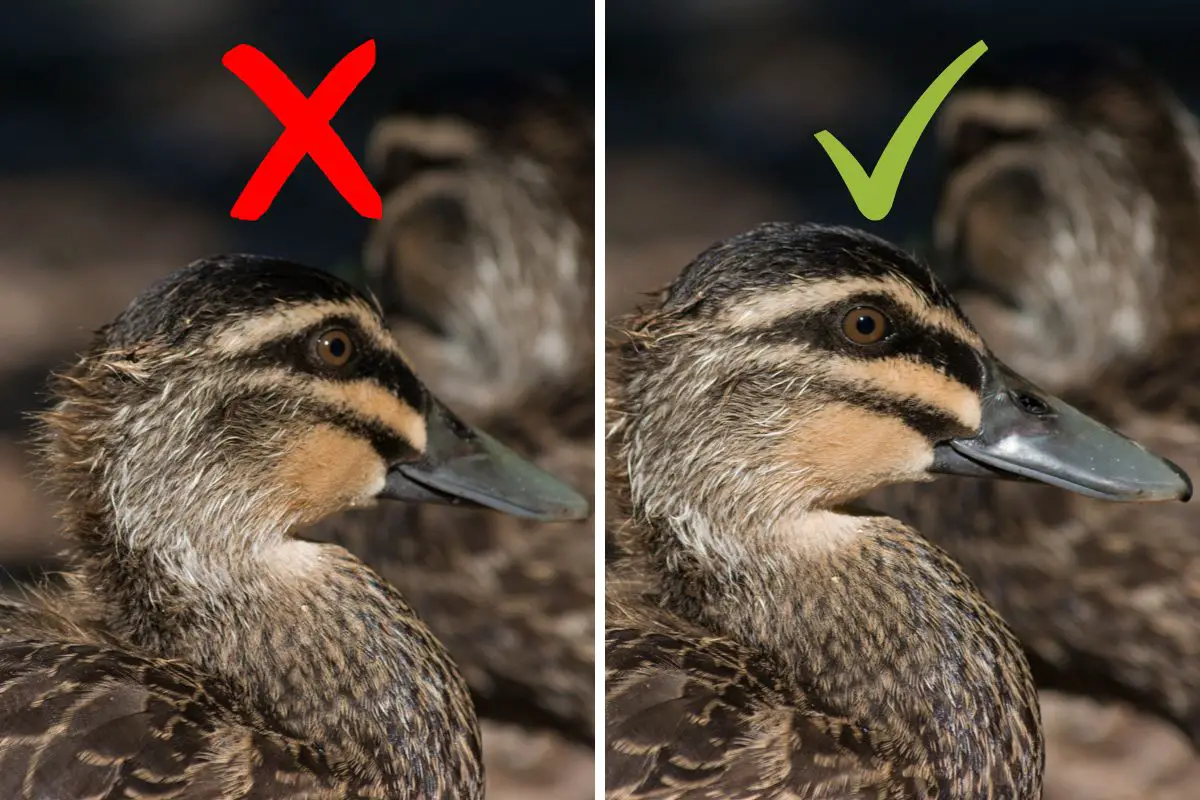
5. Make Sure The Bird’s Head Is Turned Towards The Camera
A bird photo will look better if the bird’s head is turned towards the camera, even just slightly. This provides a more engaging image. It doesn’t matter if the bird’s back is towards the camera, so long as its head is slightly turned toward it.
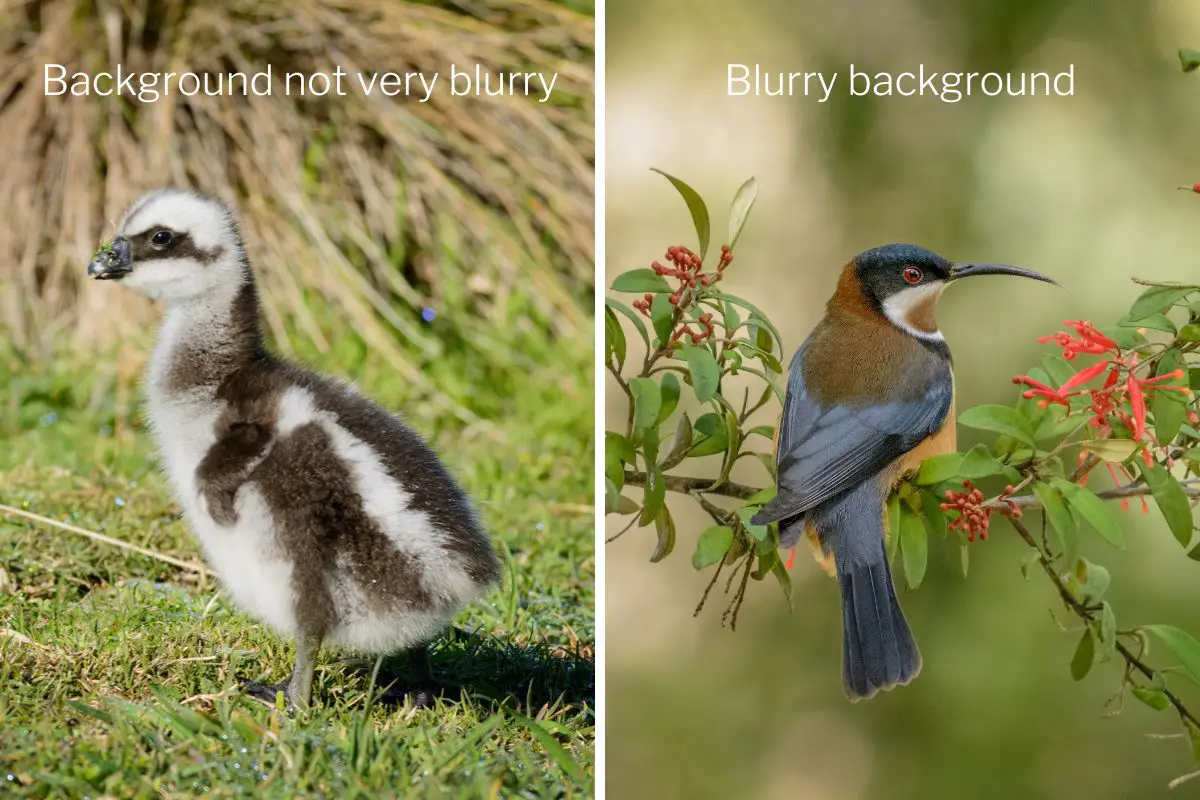
6. Blur The Background
Having a blurry background in a bird photo (any photo for that matter) is called shallow depth of field. There are a number of ways this can be achieved. When the background is blurred out it makes the bird stand out more in the image.
Blurring the background is achieved with the f stop you choose. Learn more about this here.
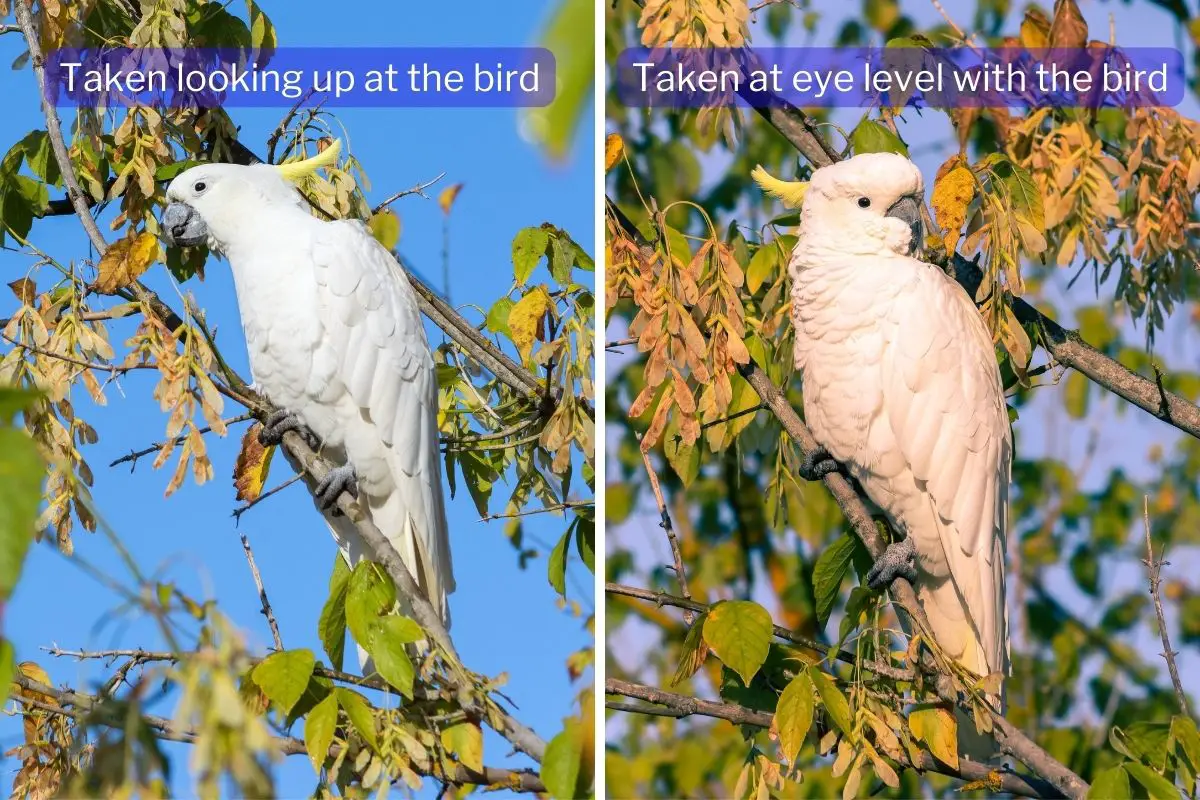
7. Shoot At Eye Level If Possible
Your bird photos will look much better if you shoot at eye level with the bird. Images that were taken from above or below eye level just don’t have the same appeal as those shot level with the eyes of the bird.
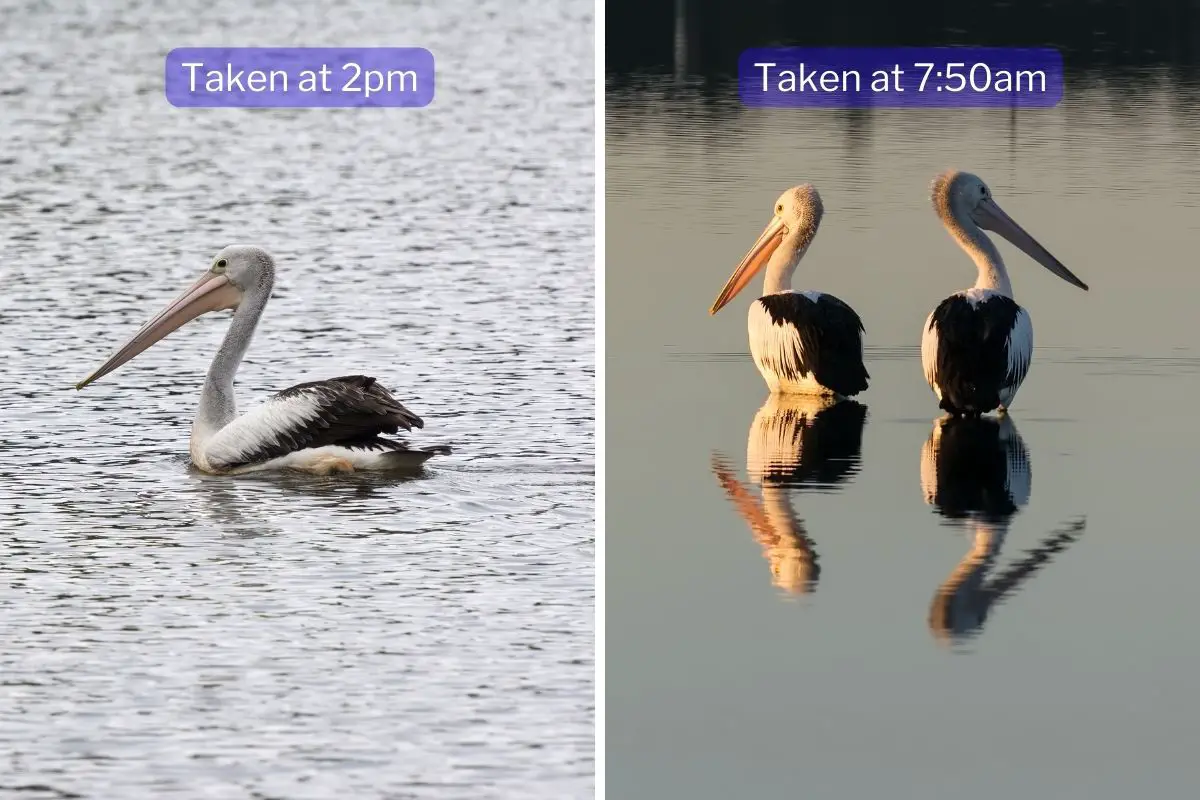
8. Shoot During Golden Hour
Golden hour is the time of day when the light is really warm in color and casts long shadows. This makes photos look a lot better than ones taken during the middle of the day when the sun is bright and high in the sky. We will look into Golden Hour a little more under the next heading below.
What Is The Best Time For Bird Photography?
As I mentioned in the list above, Golden Hour is the best time for bird photography and many other types of photography. Golden hour is the hour before and after sunrise and the hour before sunset.
Before sunrise, the light is soft, warm, and diffused (spread evenly). When the sun rises, it creates nice warm light and casts long shadows as it’s low in the sky. Just before sunset, you get similar conditions to those just after sunrise.
This type of light looks amazing in photographs and can turn an ok photo into a really good one.
Do I Need A Tripod For Bird Photography?
A tripod can be a good asset if you are just starting out with bird photography. When you are just learning the techniques involved and getting to grips with your camera settings, the last thing you want to worry about is holding the camera steady.
You don’t have to spend a fortune on a tripod, to begin with, just make sure that you buy one that can support the weight of your camera and the lens you are using.
If you think you might be doing a lot of bird photography in the future, I suggest getting a good-quality tripod. I use Surui Tripods and highly recommend them. You can browse Surui’s range of tripods here.
I go into more detail about using tripods for bird photography in this article.
References
- The Technique of Bird Photography – John Warham
- Origins Of Wildlife Photography – Mark Carwardine