When I first started bird photography over 7 years ago, I knew nothing about how to get a great photo of a bird. The results I had in my head just weren’t matching the results I was getting in the camera and I didn’t know why. Through research and a lot of practice, I found answers to a lot of questions, including why some of my bird photos were blurry.
There are many reasons why your bird photos may be blurry: a focus problem, camera shake, motion blur, poor lighting, heat haze, equipment limitations, depth of field, and post-processing results. Each of these things will produce different amounts of blur, some are fixable and some are not.
Continue reading to discover why your bird photos may be blurry and exactly how to fix the problems. Using the information in this article you will be able to finally take those amazing bird photos you have in your head and produce them in the camera.
- Are Your Bird Photos Blurry Due To Bad Focus?
- Tips For Getting Birds In Focus More Often
- How Camera Shake Affects Your Photos
- What Is Motion Blur?
- Which Shutter Speed To Use For Bird Photography
- How Light Affects The Sharpness Of Your Images
- Aperture Can Blur Your Images
- The More You Crop, The More Detail You Lose
- Equipment Limitations
- How Heat Haze Affects Your Photos
- References
As an Amazon Associate, I earn from qualifying purchases. Birdwatch World earns commissions from Amazon and similar affiliate programs from any purchases made via links in this article.
Are Your Bird Photos Blurry Due To Bad Focus?
The first and most obvious reason that you might be getting blurry bird photos is focus. Most modern cameras have amazing Autofocus systems that take a lot of the difficulty out of focusing but you still need to know how to use them. So what might be causing bad focusing in your bird photos and how can you fix it?
Reasons You May Lose Focus In A Photo
Many factors can affect whether or not a photo will be in focus:
- the focus mode used
- the number of focus points chosen when using Autofocus
- where the focus point is placed on the subject
- movement of you or your subject between one photo and the next
- Autofocus was not engaged when the photo was taken
- obstructions in front of the subject (eg. leaves or grass)
- failing to refocus when the subject moves
Discover the key gear and settings needed for bird photography in this article here on my blog.
Which Is The Right Focusing Mode?
DSLR and Mirrorless cameras generally have the same choices when it comes to focusing modes.
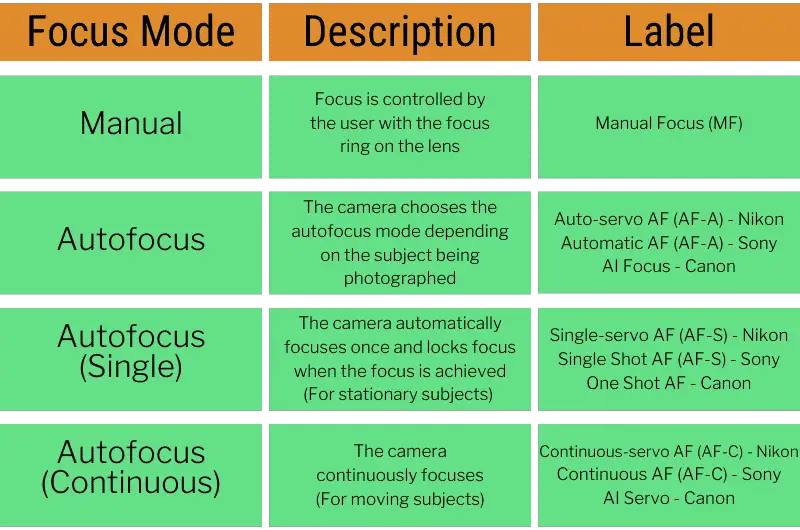
From the table above, you can see that each focus mode is designed for different situations. Manual focus is for when you want control over the focus yourself. Full Autofocus leaves the focus up to the camera, it will choose the best mode based on what you’re photographing. Single AF is best for stationary subjects and Continuos AF is what you should use for moving subjects.
If Single-servo AF is best for stationary subjects and the bird you are photographing is not moving (meaning it is perched, sitting, or standing) then it must be the best choice in this case, right? You may think that but remember we are photographing a living thing here and it could move or fly off at any moment.
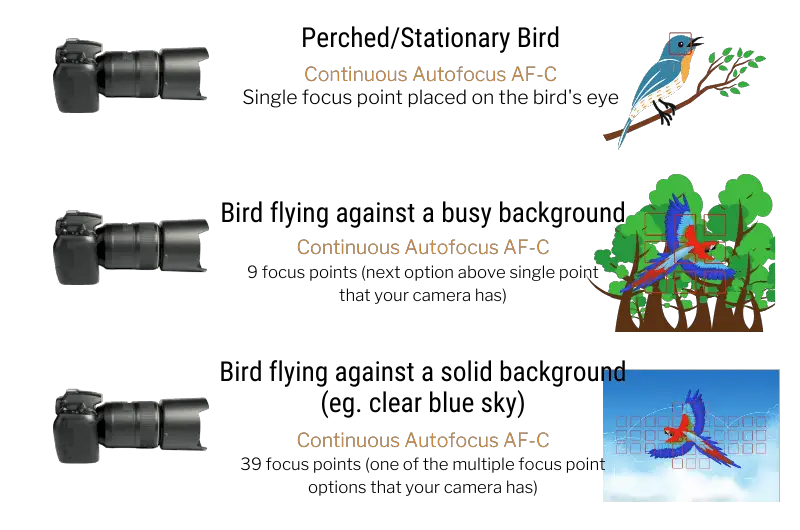
For stationary birds, it is best to choose Continuous Autofocus and then select the minimum amount of focus points (AF area) you can reliably keep on the bird. The infographic below shows my recommendations for which AF mode and area to use when photographing birds in different situations.
Why Choose These Focusing Modes?
The reason I suggest using Continuous AF instead of Single-servo AF when photographing a stationary bird is simple. When a bird is perched it is not in fact stationary. It may move its head, the perch it is on may move, and you will also move slightly. If you use continuous AF, the camera will adjust focus to compensate for these tiny movements and you will get more shots that are in focus.
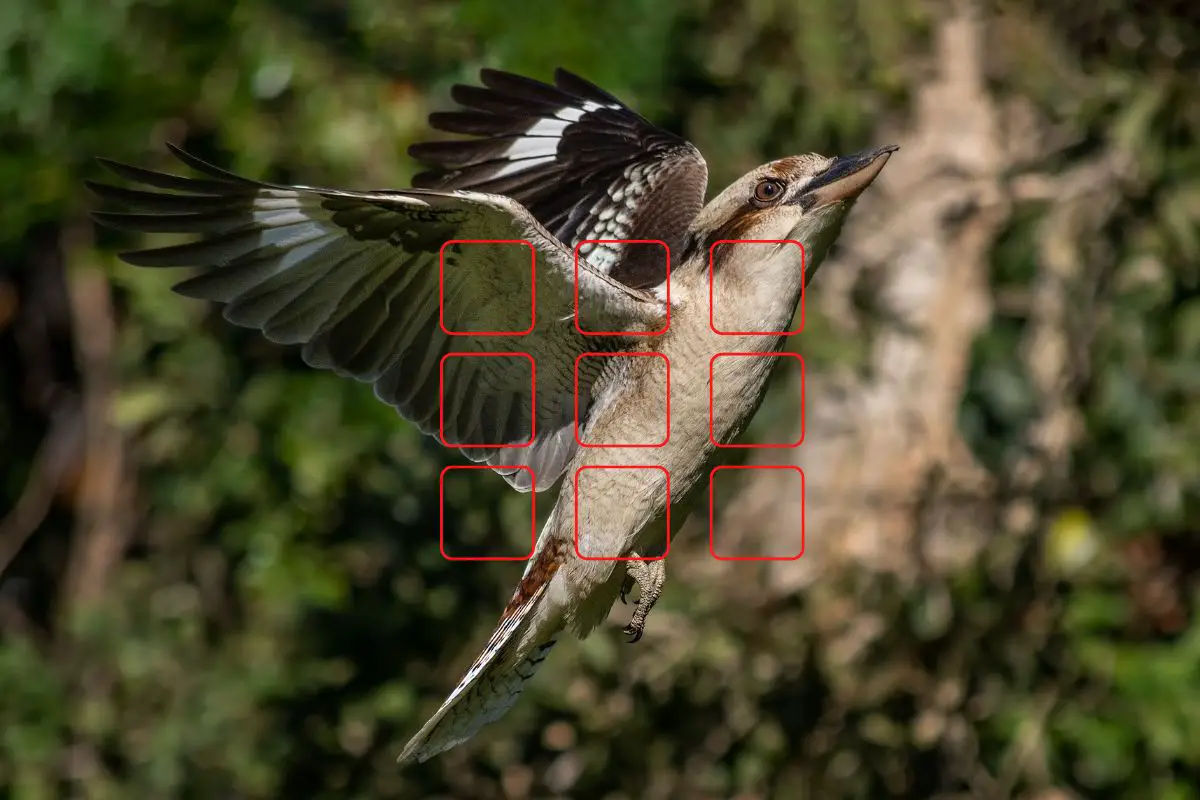
Using 9 focus points (or at least a small number of multiple points that your camera allows) is best when taking photos of a bird flying over a busy background. Because there are a lot of things behind the bird, the camera may choose to focus on something back there instead of on the bird.
It would be nearly impossible to get the bird in focus using only a single AF point in this situation unless you are skilled at tracking the bird’s movements.
Even when using 9 focus points, you may find, depending on your camera, that you will still get some shots where the bird is out of focus. The camera will often choose a focus point that is in the background. You will however get more shots in focus than you would with a single AF point.
I suggest selecting many focus points if photographing a bird flying in a blue sky or some other solid background. The reason for this is that it’s too hard to track a bird with just one single AF point. As there is little distraction in the background to confuse the camera in this situation, if the bird flies into one of the many focus points, you will get it in focus.
Is 300mm enough focal length for bird photography? Find out in this blog post.
Back Button Autofocus
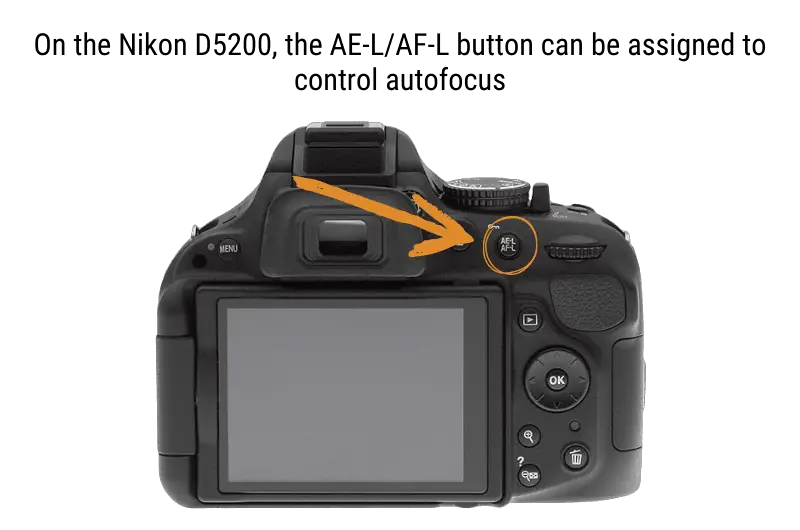
Back button autofocus is a technique that I have used for years. It utilizes a button on the back of the camera to autofocus as opposed to a half-press of the shutter button. This separates the focusing from the shutter release which is beneficial for several reasons.
Firstly, you don’t have to change focusing modes; you can leave your camera in continuous autofocus all the time. If you need to focus once and recompose your shot, you simply press the button to allow the camera to obtain focus, let go of the button, recompose the shot and press the shutter button.
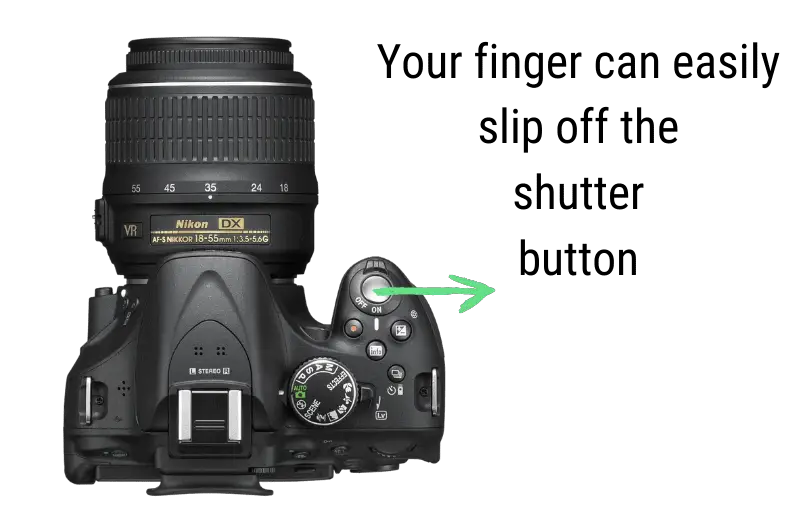
Secondly, there is less chance of you losing focus because your finger slipped off the shutter button. This can happen quite often; it doesn’t take much movement for your finger to allow the button to come up from that half-press. As soon as that happens, you’ve lost focus and will end up with a blurry bird. With back button focus, you simply keep your thumb pressed on whatever button you assign and the camera will keep focusing.
With back-button focusing, you are always ready for any shot. If you are taking photos of some rocks for example for which you would normally use single-servo AF, you can do that quite easily using the focus-recompose technique above.
If you then see a bird fly past, you can quickly track it with continuous autofocus and get the shot. Without back button focus engaged, you would have to use single-servo AF for the rocks and then quickly try to switch to continuous AF when the bird shows up. By the time you do this, the bird would most likely be gone.
Your camera will most likely have the ability to set up back button focus. Check your camera’s manual for instructions.
Obstructions In Front Of Your Subject
Sometimes you may be photographing a bird and there might be an obstruction between you and it that you don’t notice. This might be a blade of grass or a stick or something similar.
Front-Focusing
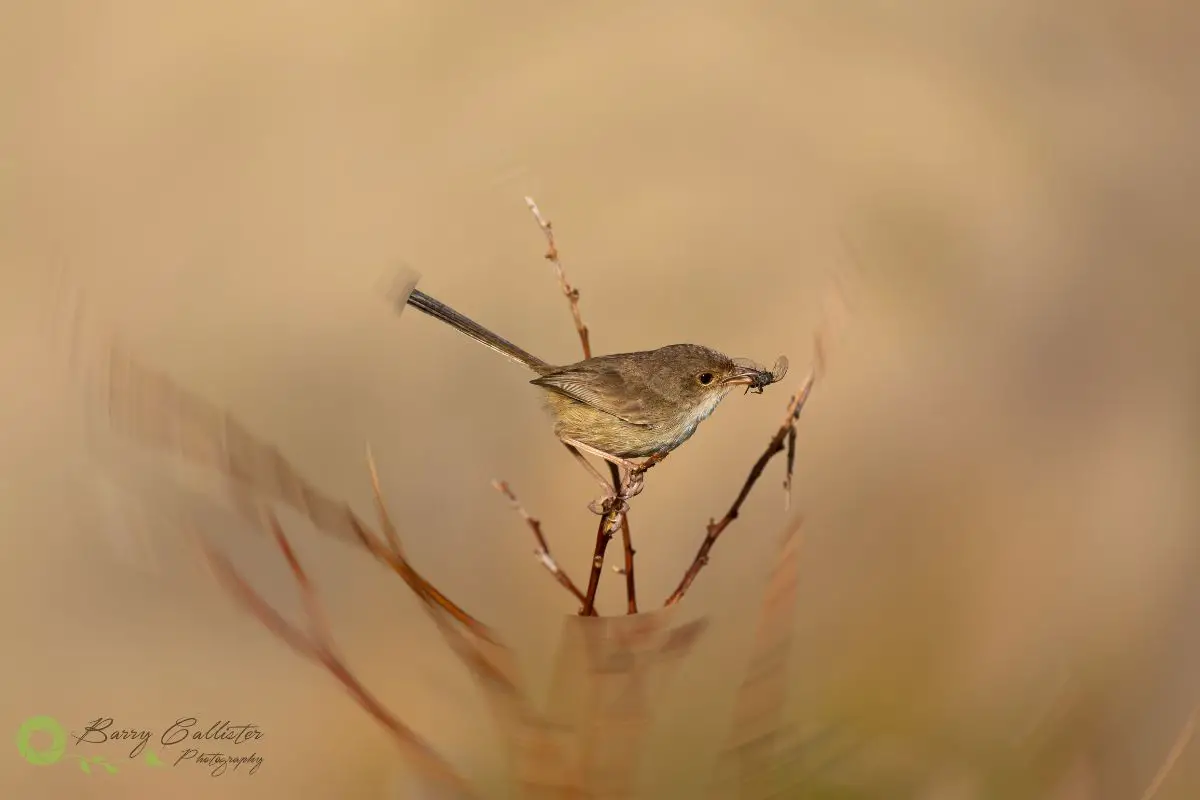
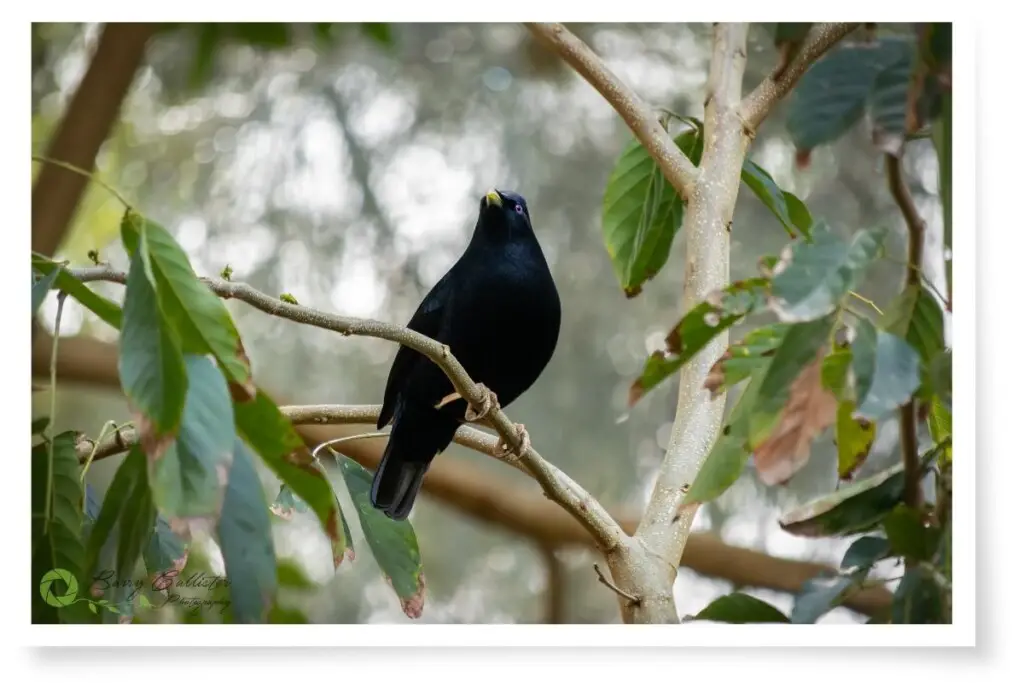
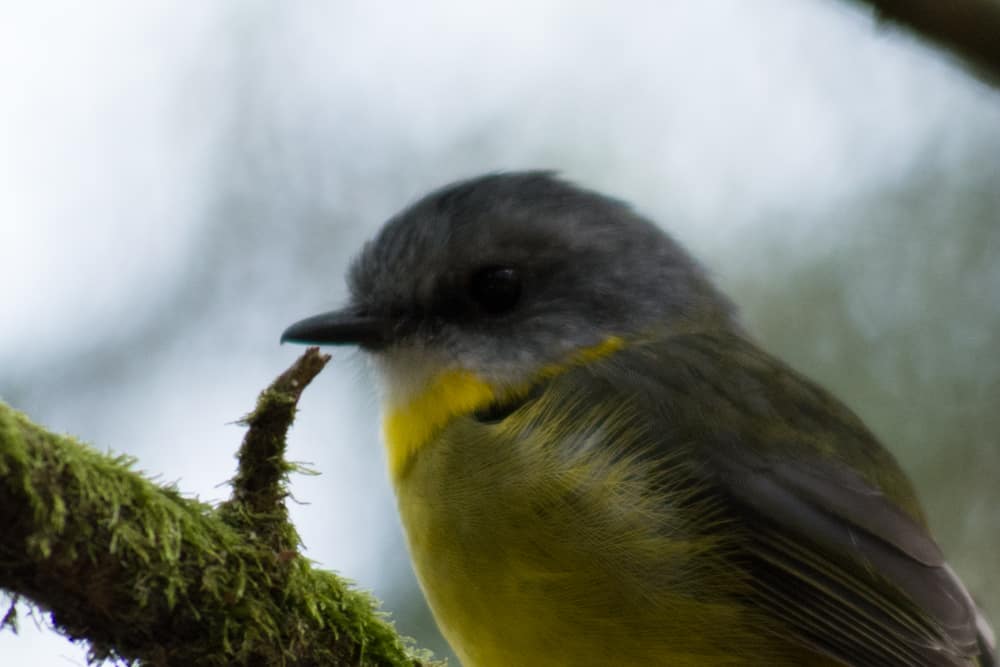
In situations like this, your camera may choose to focus on the obstruction instead of the bird. This is called front-focusing. You can see this in the image below where my camera has focused on the leaf in front of this New Holland Honeyeater and not the bird itself.
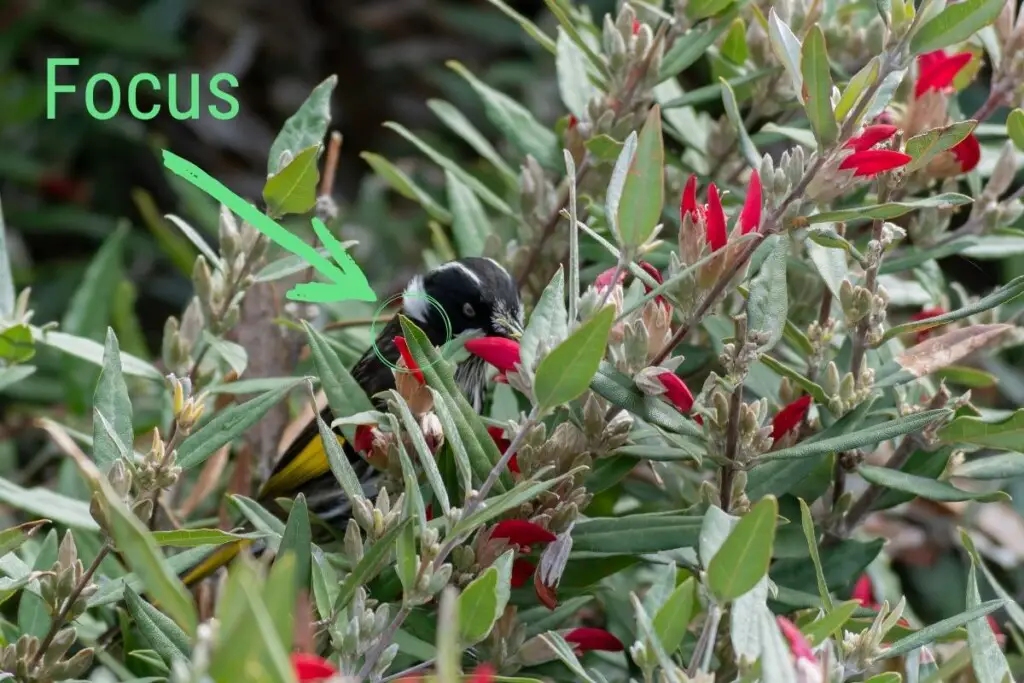
In cases like this, it’s best to make sure that the bird looks in focus through the viewfinder or on the live view screen before you press the shutter button. You can also try to use manual focus in these situations if you feel comfortable.
There will be times when you have to use manual focus, for example when a bird is in a bush with leaves and branches all around it. No camera will be able to figure out what you are trying to focus on in those situations, you have to do it yourself.
Back-Focusing
Just as your camera can choose to focus on something in front of the bird, it can also focus on something behind it. This is called back-focusing and can be very frustrating and lead to many out-of-focus shots.
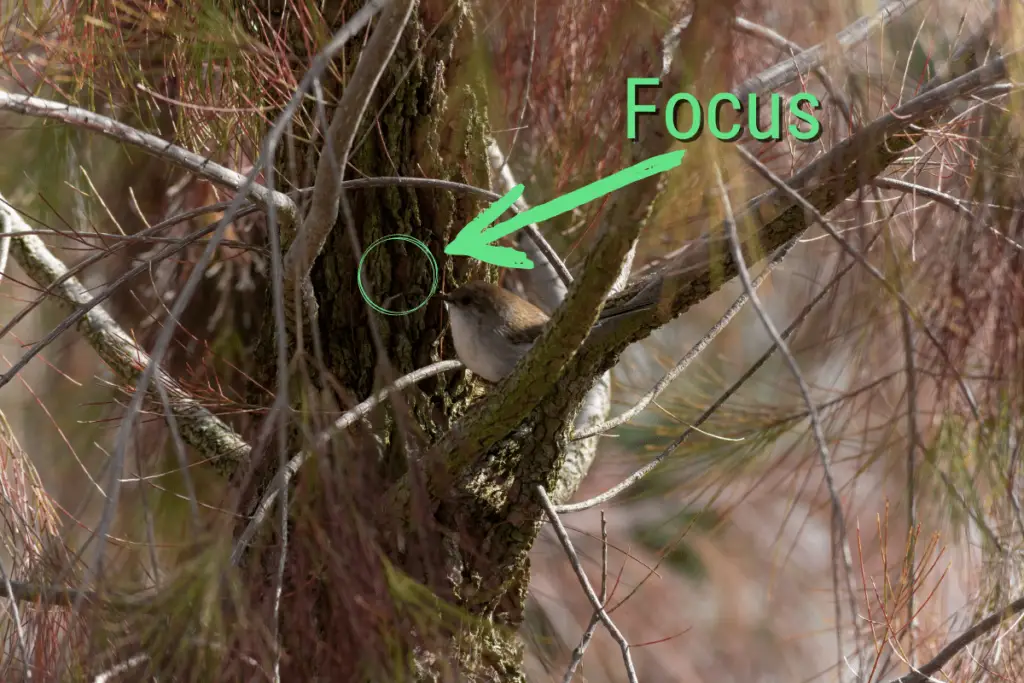
Back-focusing may be a problem with your camera and lens calibration but most of the time it is due to technique. It is more likely that you have selected the wrong focus area or focus mode for that particular shot.
You may also simply not have placed the focus point in the right place. For the shot above, the best choice would be either manual focus or a single focus point with continuous autofocus.
Back-focusing can be fixed by a camera repair shop. If you notice a lot of back-focusing happening with your camera and a particular lens, you may need to take it in to be calibrated. Make sure you do a lot of testing before you take your camera in for an adjustment. More often than not back-focusing is caused by poor technique.
Tips For Getting Birds In Focus More Often
There are a few things that you can do to overcome some of the focusing problems mentioned above. These are really simple things that just might get you more shots you are proud of.
Burst Shooting
Digital cameras are great but they are not perfect. As you have learned above, their focusing systems can be confused by many things.
Imagine that you are photographing a bird perched on a rock. You are clicking off one shot at a time and take about 10 photos. When you look at the images on the LCD screen of your camera, only about 2 of the 10 are sharply in focus.
This is just part of bird photography and it happens to the best of us. A person with more skill or better equipment might get 4 out of 10 sharp but not 100% of all shots taken will have sharp focus. One way to overcome this is to shoot in burst mode.
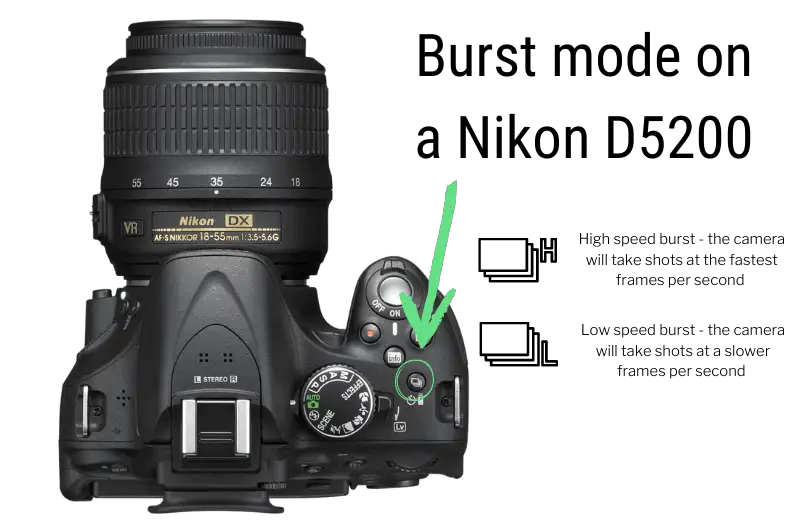
In one of your camera’s menus, there will be a burst mode setting. When you turn it on, the camera will take multiple exposures every time you press the shutter button, instead of just one each time. Burst mode is usually represented by a stack of rectangles to indicate multiple frames.
If you now take a burst of say 20 shots, simple math tells us that you should end up with 4 shots that are sharp instead of just 2. It will likely be more than this as using burst mode reduces the time between shots, therefore reducing the amount of camera shake. What’s camera shake? I talk about that later in this article.
Refocusing Each Shot
This technique works for stationary birds too and when you are using single-servo AF (the camera achieves focus and then stops trying to focus). Instead of just focusing once and then clicking off a heap of shots, try taking a few, moving the camera away to focus on something else, and then moving back to the bird to re-acquire focus again.
Refocusing like this will assure that you get more decent shots.
Even when you have focus, you still may not get all of your shots to come out sharp. You may move the camera forward or backward slightly or the bird may move. If the bird happens to be perched on a twig that is moving in the wind, this will also cause your camera to lose focus.
How Camera Shake Affects Your Photos
Camera shake is where your images may be blurred because of movements you made when holding the camera. Depending on the focal length of the lens you are using and the shutter speed used, even the tiniest movements in the camera can create blur in your photos.

In the photo above, you can see that the bird is just not sharp. This image was taken at a focal length of 175mm with a shutter speed of 1/200 second. The bird was still at the time so any movement created in the image has been caused by camera shake.
If I had chosen a higher shutter speed for this photo it might have turned out better. A shutter speed of perhaps 1/320 second would have been enough to overcome the camera shake.
What Is Motion Blur?
Motion blur is blur created by the movement of your subject as opposed to the movement of the camera in the case of camera shake. This can also occur if you are shooting from a moving vehicle.
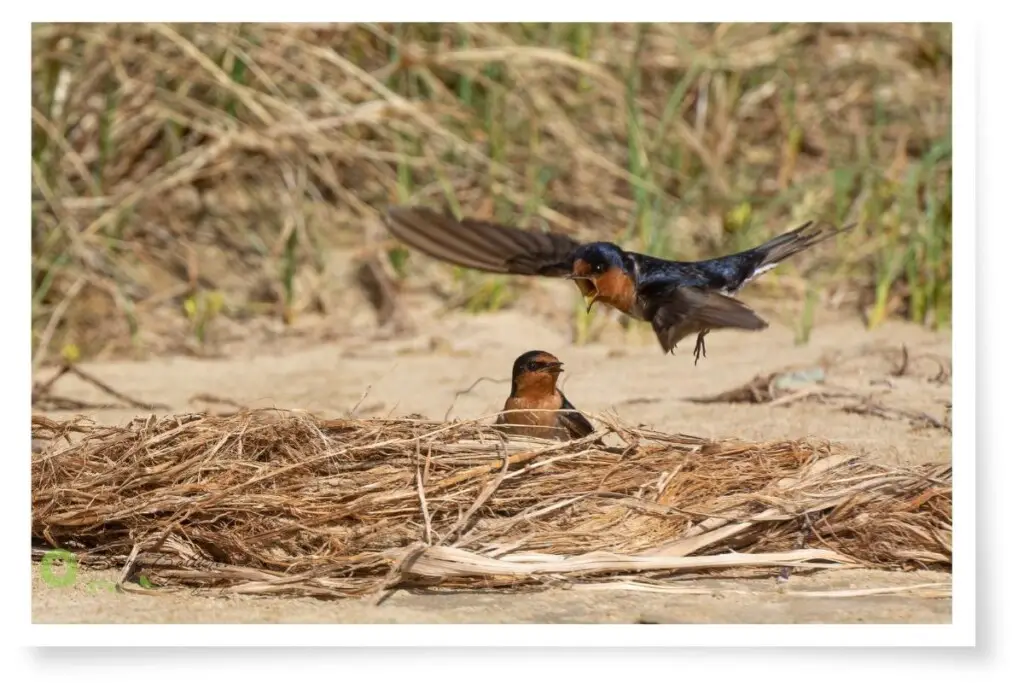
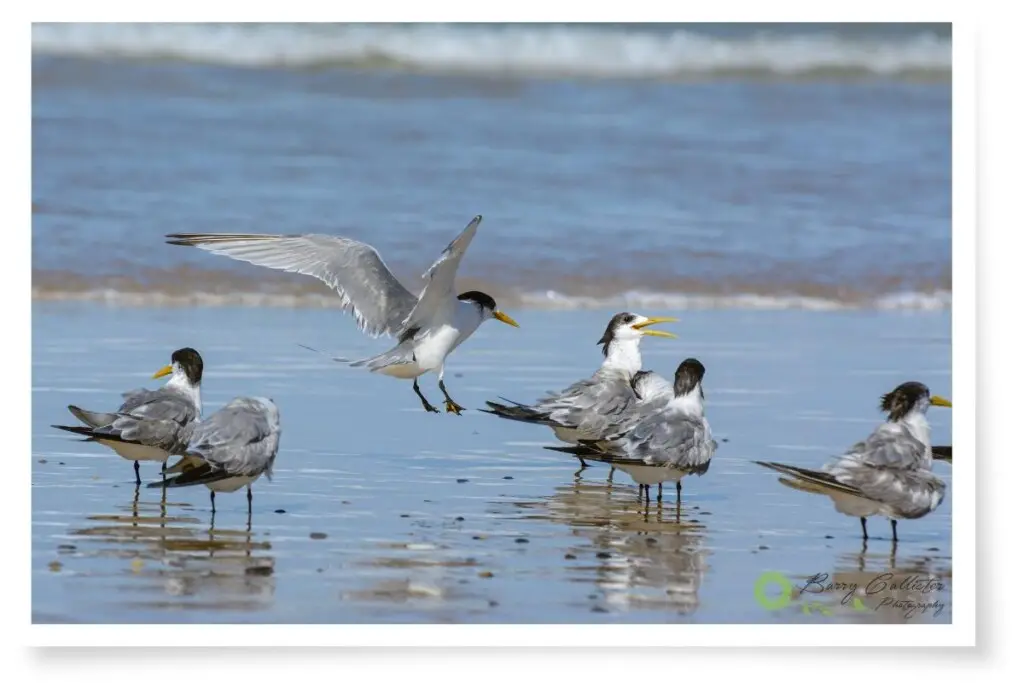
In the image above you can see that the Welcome Swallow that is flying is a lot less sharp than the one standing on the sand. The reason for this is the flying bird was moving when I took the shot and the other bird was not. I could have frozen the movement of the flying swallow if I had used a shutter speed faster than 1/2000 second.
It can be difficult to figure out exactly which shutter speed you need to use for particular situations as each bird species tend to move at different speeds. So what shutter speed do you need to ensure you freeze the movement and get a nice sharp photo?
Which Shutter Speed To Use For Bird Photography
Unfortunately, there is no “magic formula” for which shutter speeds to use for bird photography. I will provide some suggestions here but keep in mind they are only guidelines and may not produce the same results every time.
One general rule to keep in mind is that choosing the fastest shutter speed you can is always the best thing to do. Using faster shutter speeds will always produce sharper images. Of course, you may not always have the amount of light you need to be able to use a really fast shutter speed.
Another thing you need to remember is the Reciprocal Rule. This states that to prevent blur in your images created by camera shake that your shutter speed should be equal to or greater than your focal length. So if you are using a 300mm lens, the minimum shutter speed you should hand-hold a shot at is 1/300 second.
This is a rule of thumb and can be broken. It also doesn’t apply when you are using a tripod. Tripods steady the camera and allow the use of much slower shutter speeds with stationary subjects.
The table below will give you a basic outline of the shutter speeds required to produce better bird photos:
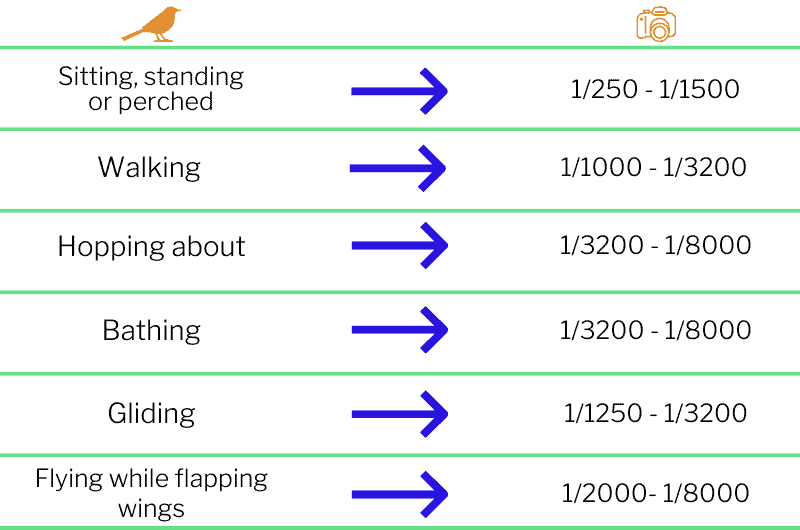
*Not many cameras go to 1/8000 shutter speed but some cameras can do that now so I included it. Just choose the highest shutter speed your camera will allow in those cases.
Of course, there are exceptions to the shutter speeds outlined above. You may find you can take perfectly sharp photos of sitting, standing, or perched birds at shutter speeds as low as 1/50 second. If you have lenses with vibration reduction or a camera or lens with image stabilization then you may be able to use really slow shutter speeds.
To achieve some of the shutter speeds above you will have to adjust your camera’s ISO and Aperture values. It will depend on the lighting conditions in which you are shooting.
How Light Affects The Sharpness Of Your Images
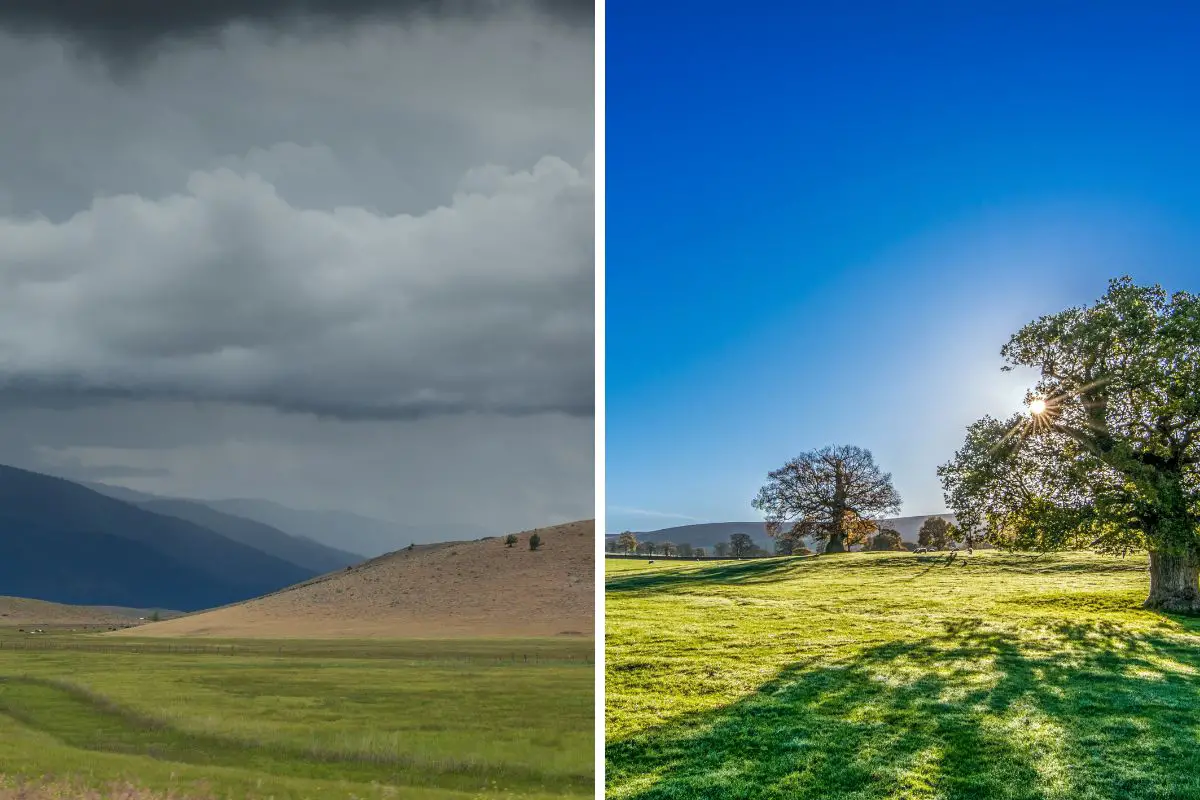
How much light you have available when taking a bird photo will also affect how sharp your images come out. If you are shooting in low light your images will come out less sharp. You will get much sharper images shooting in full sun.


The images above were both taken at 1/200 second. You can see that there is a noticeable difference in sharpness between the darker image and the one on the right taken in better light (I used a flash for this shot).
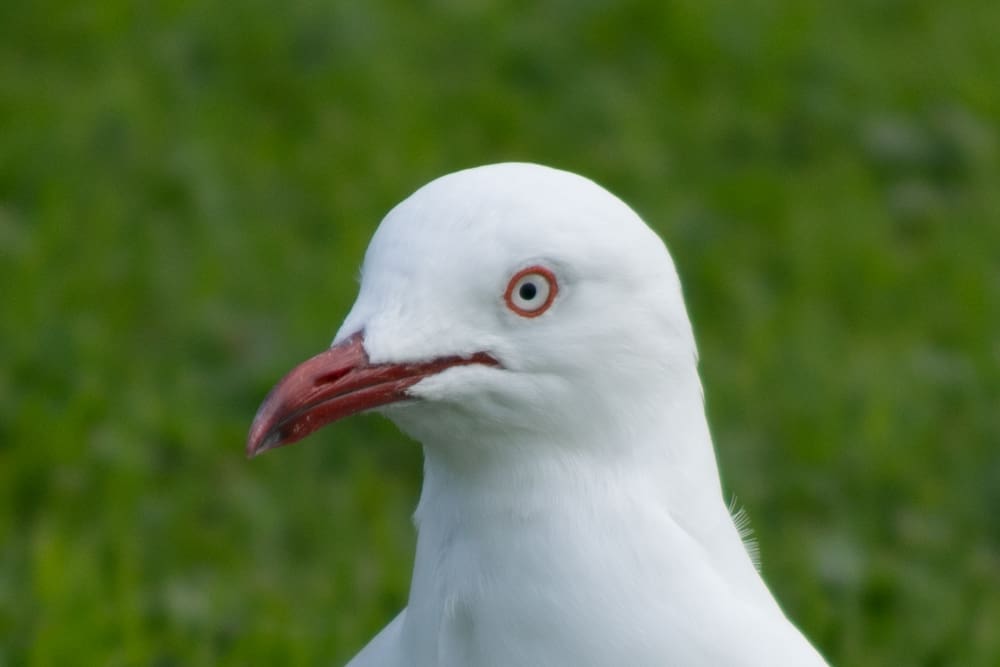
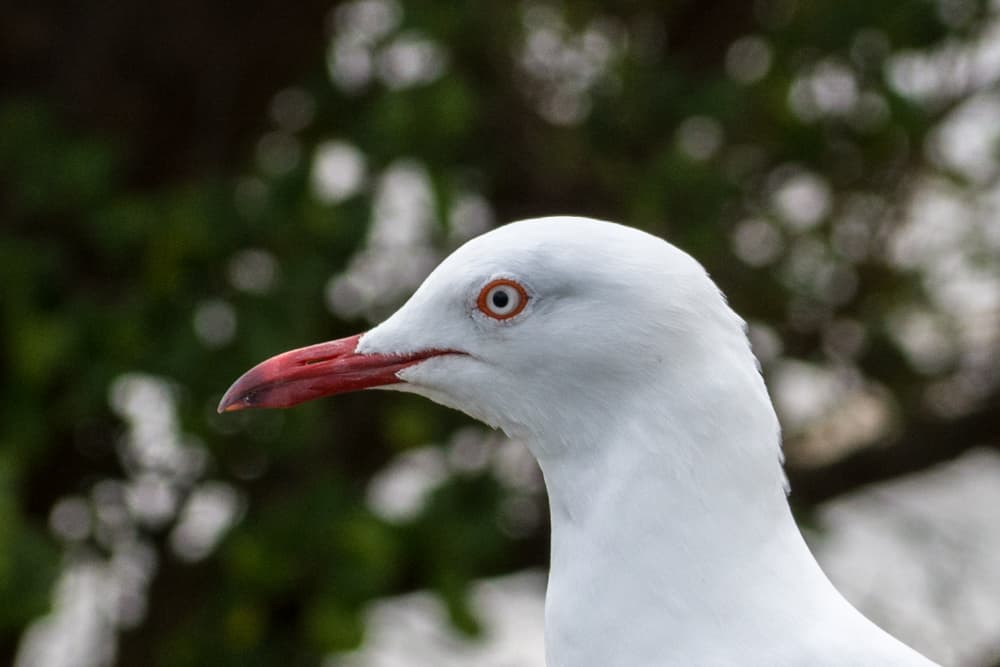
Aperture Can Blur Your Images
The aperture you choose will also affect how sharp your pictures will be. Wider apertures such as f/4.0 will result in a softer image and smaller apertures such as f/8.0 will give you a sharper photo.
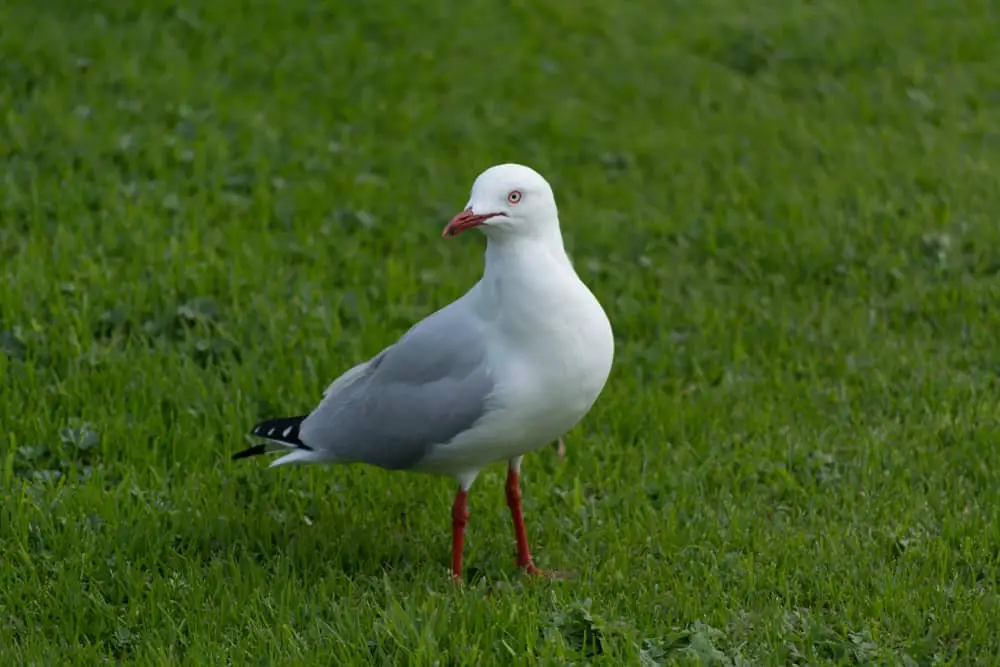
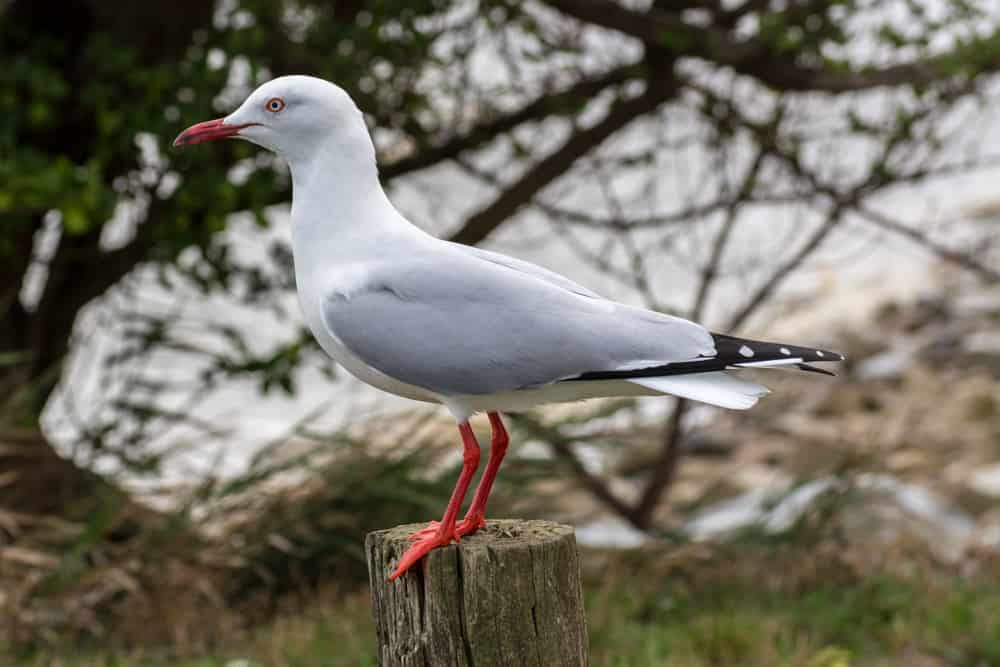
The Seagull images below were taken in similar lighting conditions with different apertures. You can see that the shot on the right taken at f/8.0 is much sharper than the one on the left taken at f/5.6. This is not blur but what is referred to as a softer image.
Read more about the best aperture for bird photography in this post here on my blog.
The More You Crop, The More Detail You Lose
Another reason that your images may be blurry is that you have cropped them too much in post-processing.
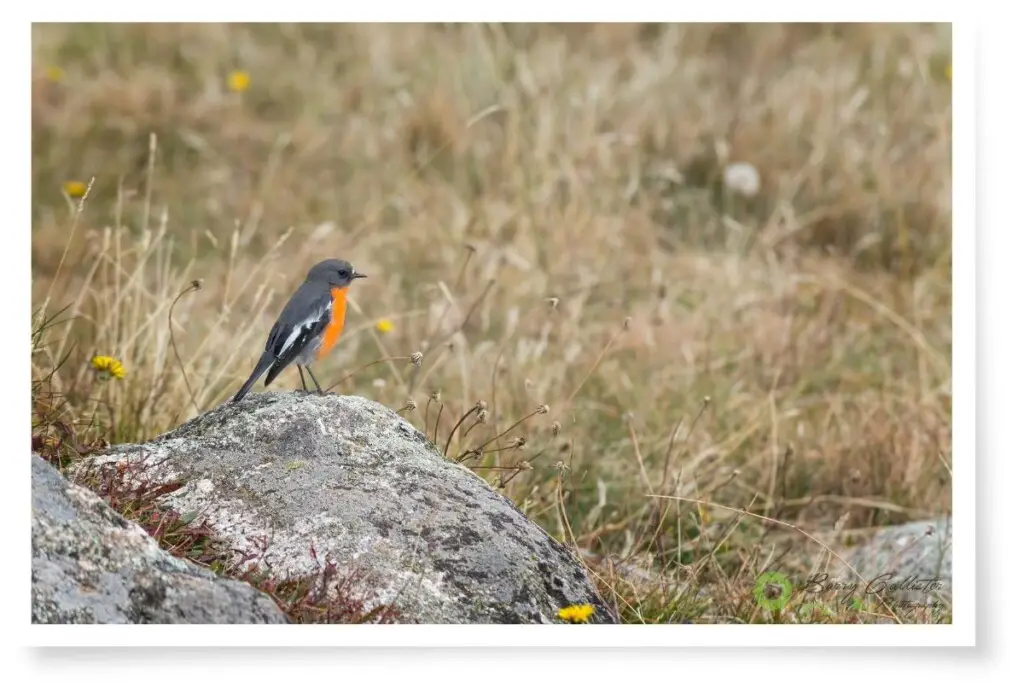
Imagine you have taken a photo of a bird and it was very small in the frame such as the image below:
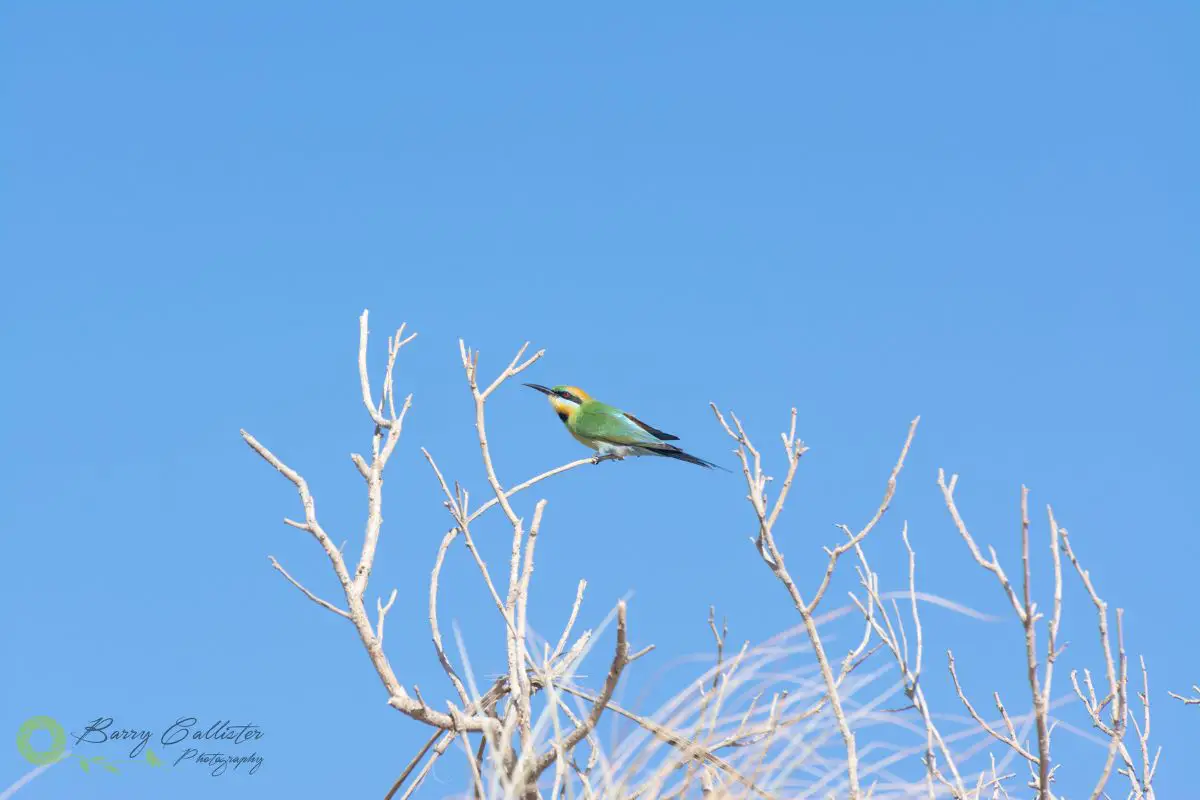
Your first instinct might be to crop the image so you can make the bird bigger in the frame. The problem is, that the more you crop it, the more detail you will lose.
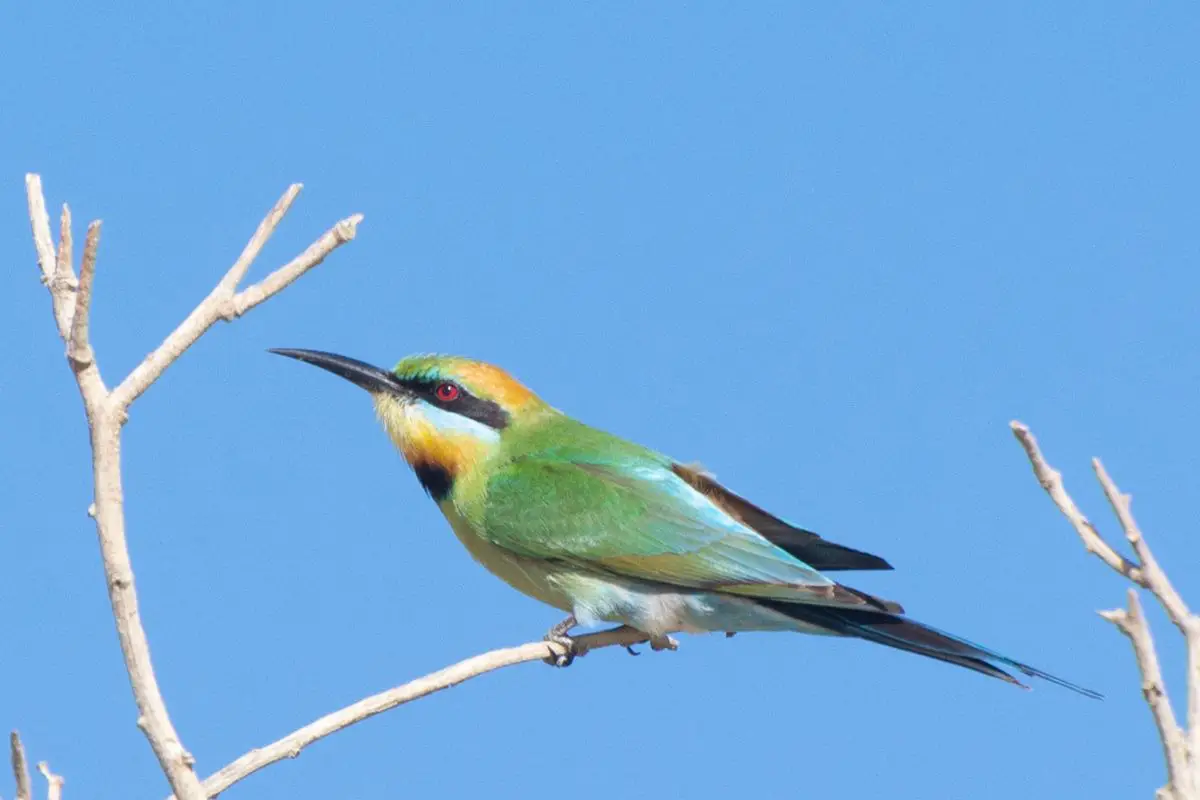
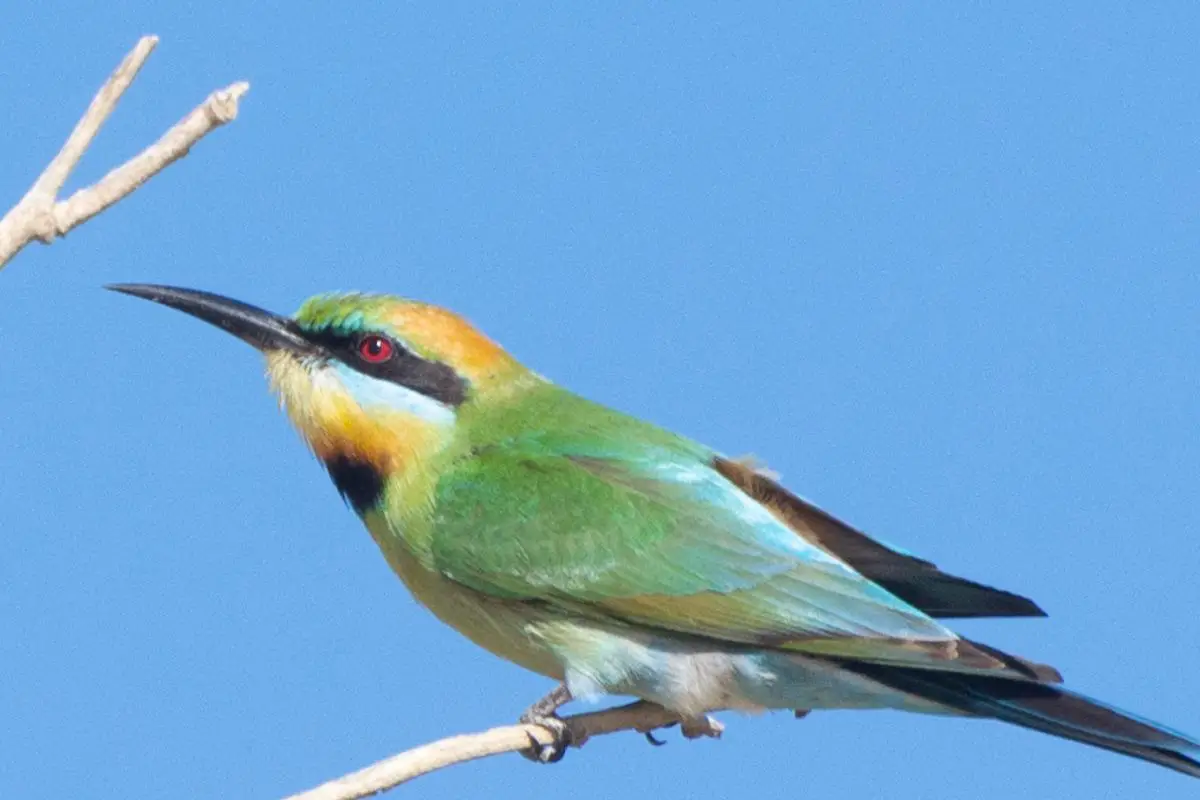
The reason you lose sharpness when cropping an image is that cropping stretches the pixels over a larger area, thus making them appear less sharp. If you cropped in far enough you would start to see individual pixels.
This is taking it to the extreme, of course, and you would never want to crop an image in this much. However, I wanted to do it here to show you how much detail you lose by cropping.
Equipment Limitations
You have probably heard photographers talk about lenses being “sharp”? They also talk about camera sensor size and the number of megapixels a camera has. They talk a lot about these things because they all have an impact on how much detail their photos will ultimately have.
Look At The Lens First
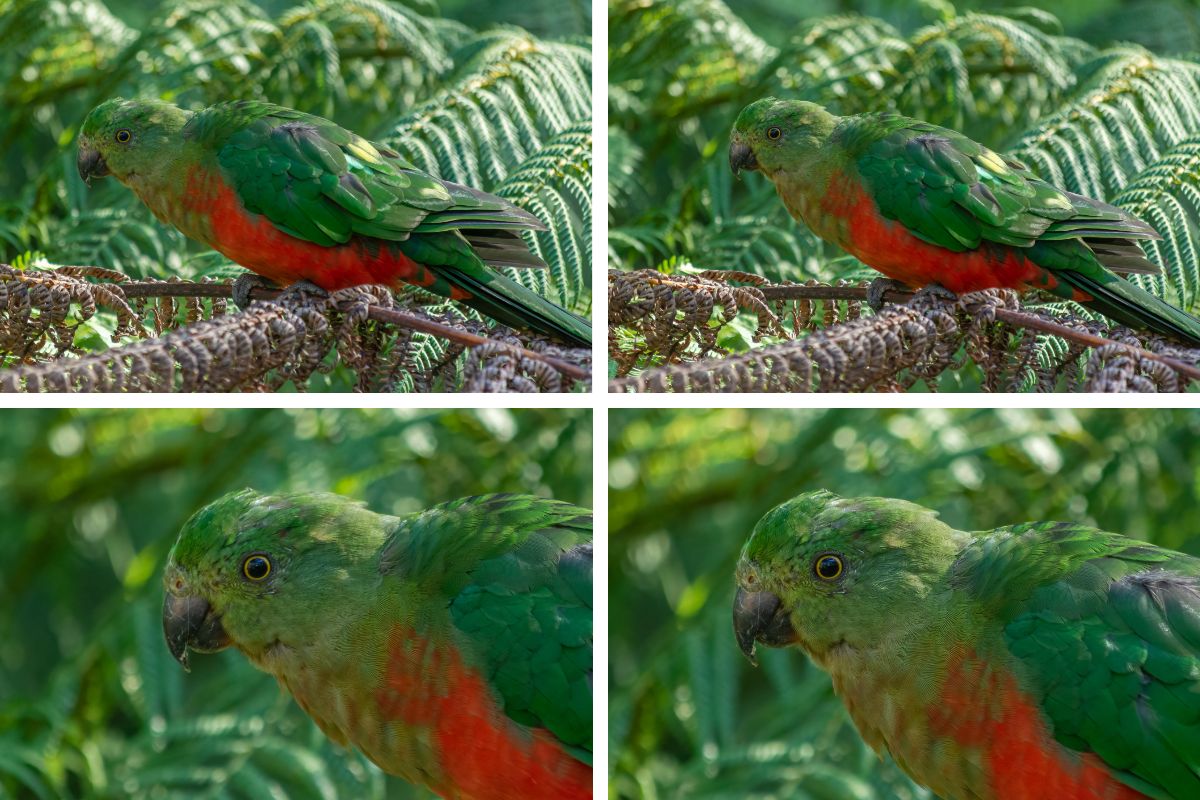
Below I have placed two images side-by-side taken with two different lenses that I own. The image on the left was taken with an AF-S Nikkor 55-200mm f/4.0-5.6 lens and the image on the right was taken with my AF-S Nikkor 70-300mm f/4.5-5.6 lens.
Hopefully, you can see how much sharper the image on the right is. All the finer details in the feathers are more visible and it’s just a better-quality image. They are both good photos however, with my trained eyes I can see that there is a slight difference in sharpness.
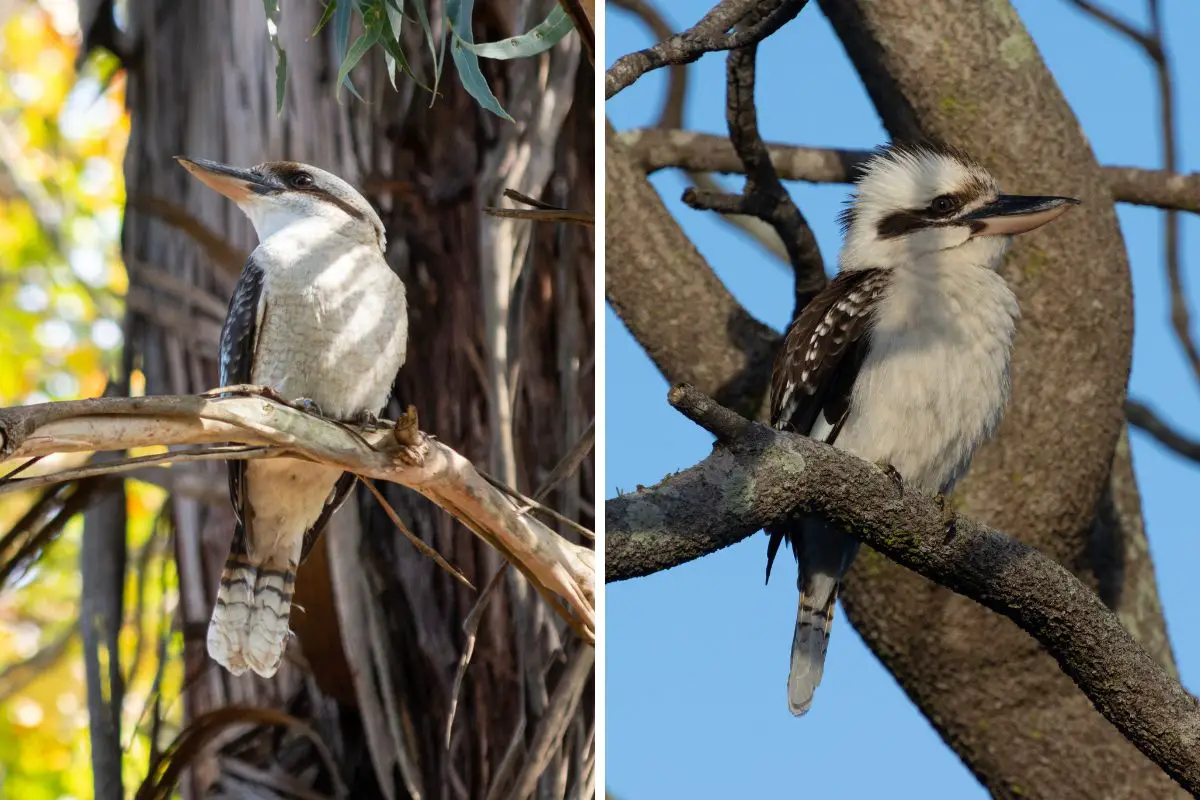
Your lens is the first thing you should look at if you are not satisfied with the quality of the photos you are getting. Both of the images above were taken with a Nikon D5200 DSLR. If you are thinking of upgrading either your camera or your lens, upgrade your lens first.
Size Does Matter When It Comes To Camera Sensors
The physical size of the sensor in a camera can also affect the quality of your images. It won’t make them blurry but it may mean they have less detail.
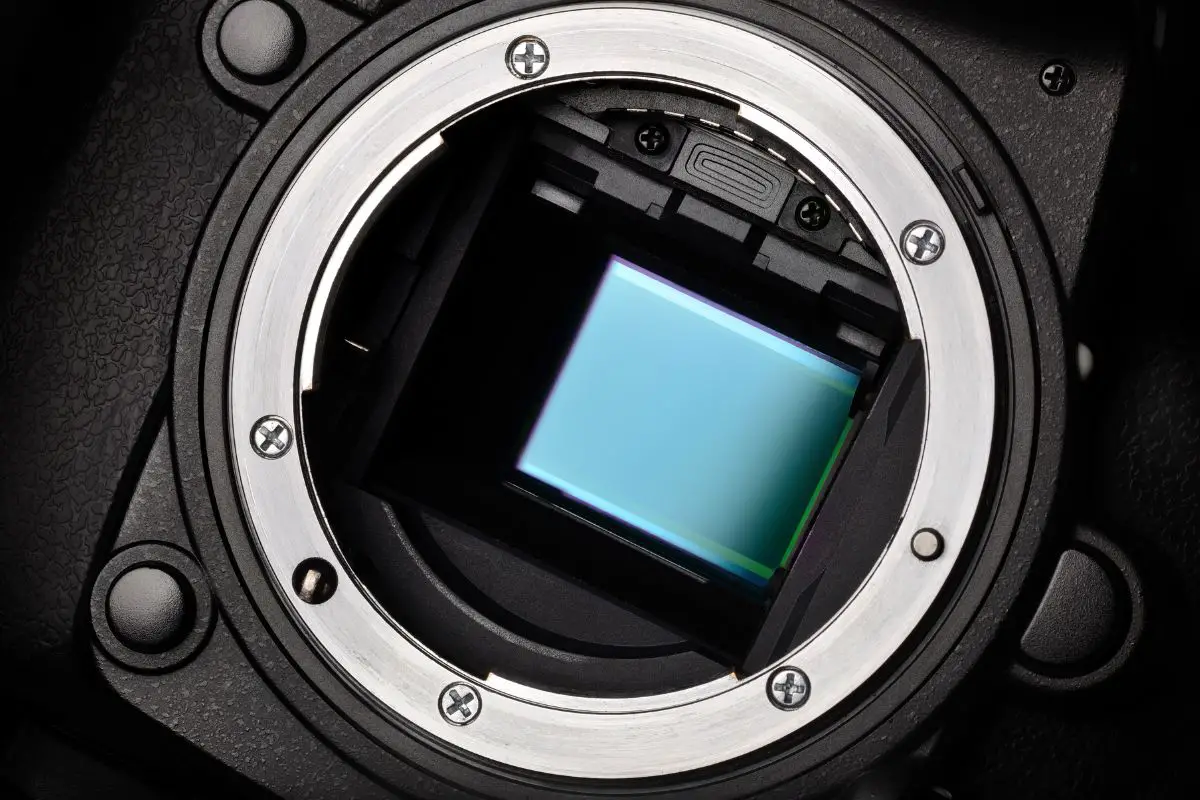
The two main types of camera sensors are Full-frame and APS-C or Crop sensors. Full-frame sensors are based on the size of 35mm film and are 36mm X 24mm. Nikon, Sony, and Pentax have APS-C sensors that are called 1.5x crop sensors; they are 23.6mm X 15.6mm. There are other types of sensors but I won’t go into them here.
Because a full-frame sensor is physically larger it can absorb more light and therefore give a better-quality image. Full-frame sensors are known for their ability to perform better in low-light situations than crop sensor cameras. Crop sensors also produce more noise (the grain that can be seen in photos taken with high ISO values) than full-frame sensors.
Are More Megapixels Better?
The amount of megapixels a digital camera’s sensor contains has been a marker for image quality for some time now, everyone always wants more megapixels! However, the number of megapixels is not as important as the size of the pixels.
I’m not going to go too deep into this here in this article as this subject could be a 1500-word post by itself?! I will attempt to answer this widely debated question in the simplest way possible.
What Is A Pixel?
A pixel is a unit of digital image length. In basic terms, it is one of the tiny dots or squares that make up a digital image. Think of it as a digital mosaic; each pixel is one tiny tile of many that when put together make up the entire picture.
What Is A Megapixel?
A megapixel is a million pixels. My Nikon D5200 has a 24-megapixel sensor. It produces an image that is 6000 x 4000 pixels. It’s just simple maths:
6000 X 4000 = 24, 000, 000 pixels
Medium format cameras such as the Hasselblad H6D-100c have much larger sensors. In the case of the H6D-100c, its sensor is 53.4mm X 40mm and has 100 megapixels?! These medium format cameras produce images of amazing quality but it does come at a huge price; the H6D-100c is currently around USD 33,000!
Medium format cameras produce better quality images for one simple reason – their sensors are bigger. This means that more pixels can be built into the sensor and those pixels can be bigger. More importantly, it means that the sensor can gather more light – that’s what matters.
The megapixel count is only important when you are printing your images. If you want to print huge matte or canvas prints, then more megapixels are an advantage.
As far as the quality of your images, more megapixels are not necessarily going to give you more quality. You want a sensor that can gather more light. Cramming more pixels into a sensor reduces the amount of light they can gather as they will naturally be smaller in size.
When it comes to the amount of blur in your images, your sensor has nothing to do with it. What we are talking about here more than anything else is more detail; a better-quality image. A larger sensor will produce images that are sharper in the really fine details such as the tiny tips of feathers on the bird, or the texture in the skin on their legs and feet.
How Heat Haze Affects Your Photos
You most likely have seen a bitumen road on a hot day and seen the hot air rising off it?
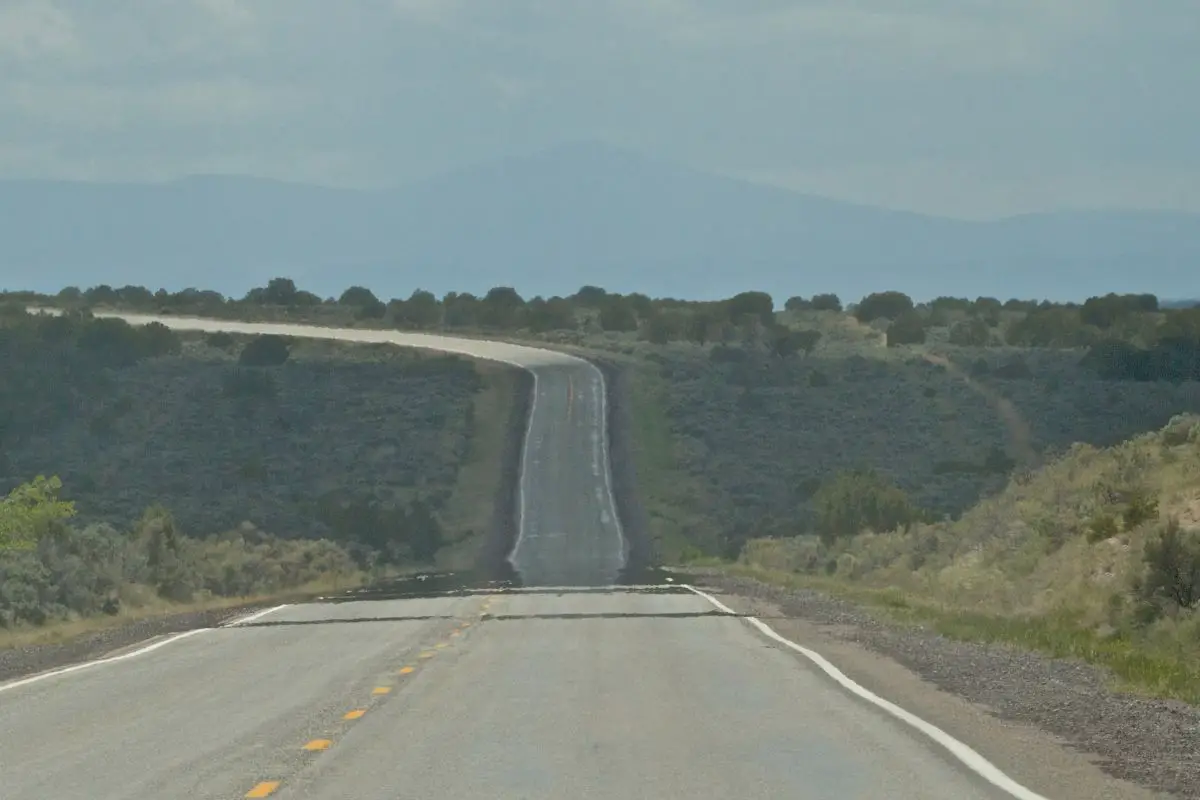
This is a wildlife photographer’s worst enemy! And, it gets worse the further away from your subject you are. If your photos are blurry, this could be the reason.
There is nothing you can do about heat haze in your photos apart from moving closer to your subject or simply shooting on a cooler day or in a different location.
Heat haze will be present in most photos you take from a distance. It is not going to blur your images completely but it will make them less sharp.
References
- Photography techniques sourced from – Stunning Digital Photography by Tony Northrup
- Megapixel information – 7 FACTS For Better Image Quality – Megapixels, Resolution, Image Sensor Size, Photosites??? YouTube video by Karl Taylor