Bird photography is challenging when you’re a beginner and choosing the correct camera settings is a big part of this. In this article, I’m going to reveal 9 common bird photography camera settings mistakes beginners make. After reading this you will be able to identify and correct the mistakes that are ruining your photos.
The following camera settings mistakes are in no particular order. You may find that you are making more than one of these errors so be sure to read the entire article.
1. Incorrect Shooting Mode
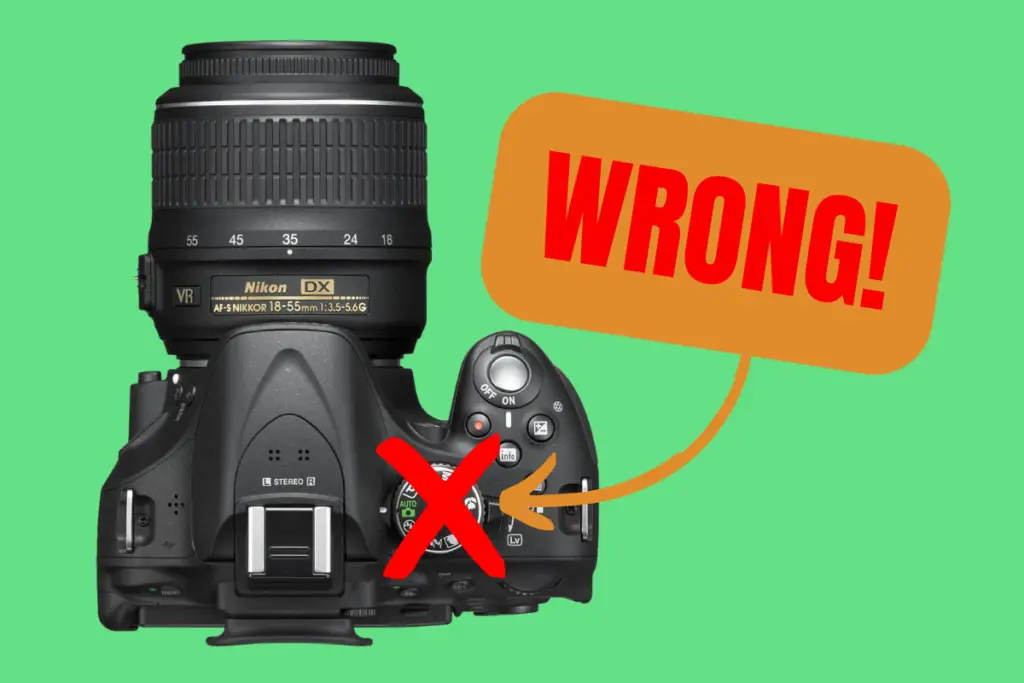
The first mistake any beginner bird photographer is going to make with their camera settings is choosing the wrong shooting mode.
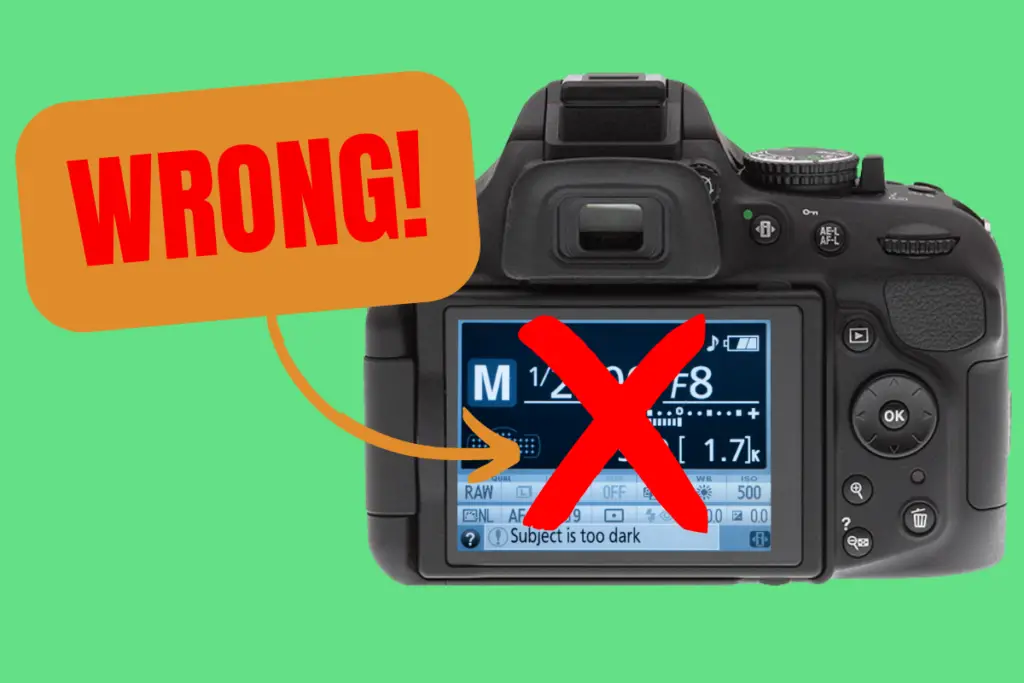
Let me start by saying, loud and clear, that AUTO MODE IS NOT FOR BIRD PHOTOGRAPHY.
Auto mode is fantastic for quick snapshots of the family or holiday snaps but it will not work for bird photography. This mode gives the camera total control over the settings. Trust me when I say it will not choose the right ones!
When set to Auto Mode, the camera will assess the scene in front of it and decide what IT thinks you are trying to photograph. It will select the focus mode, shutter speed, ISO, and aperture based on the light information coming in through the lens.
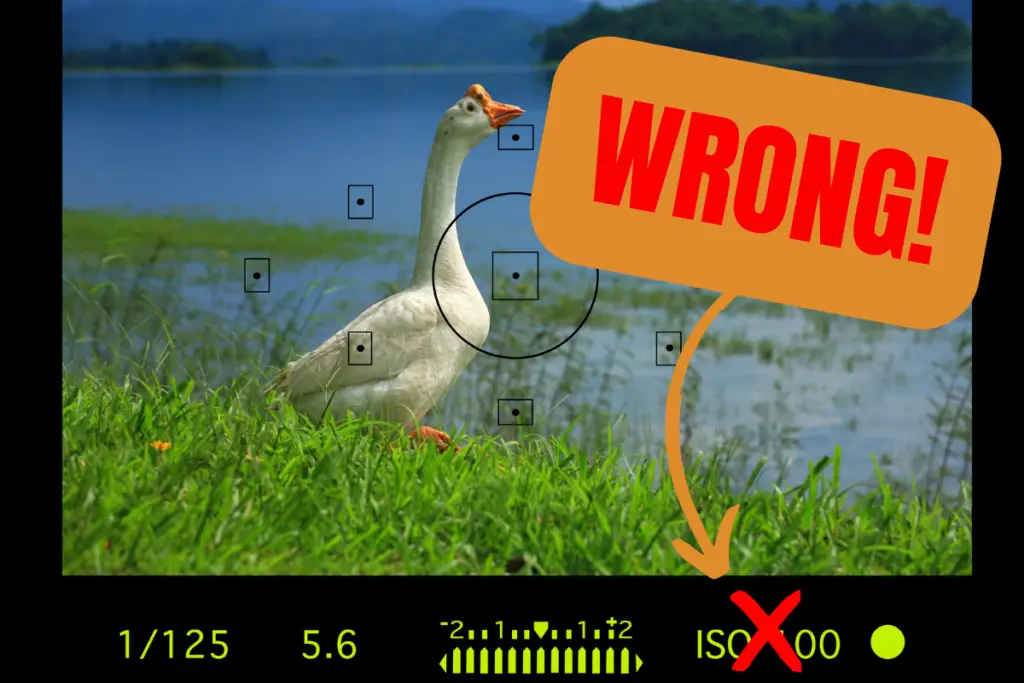
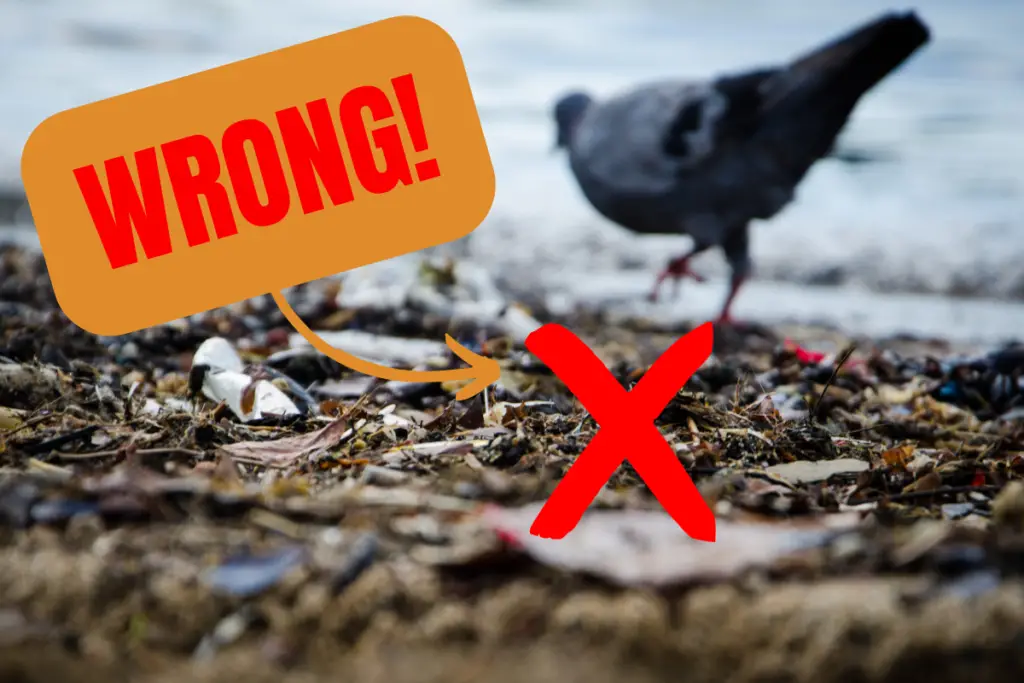
Let’s say you are photographing a bird in a scene such as in the image below:
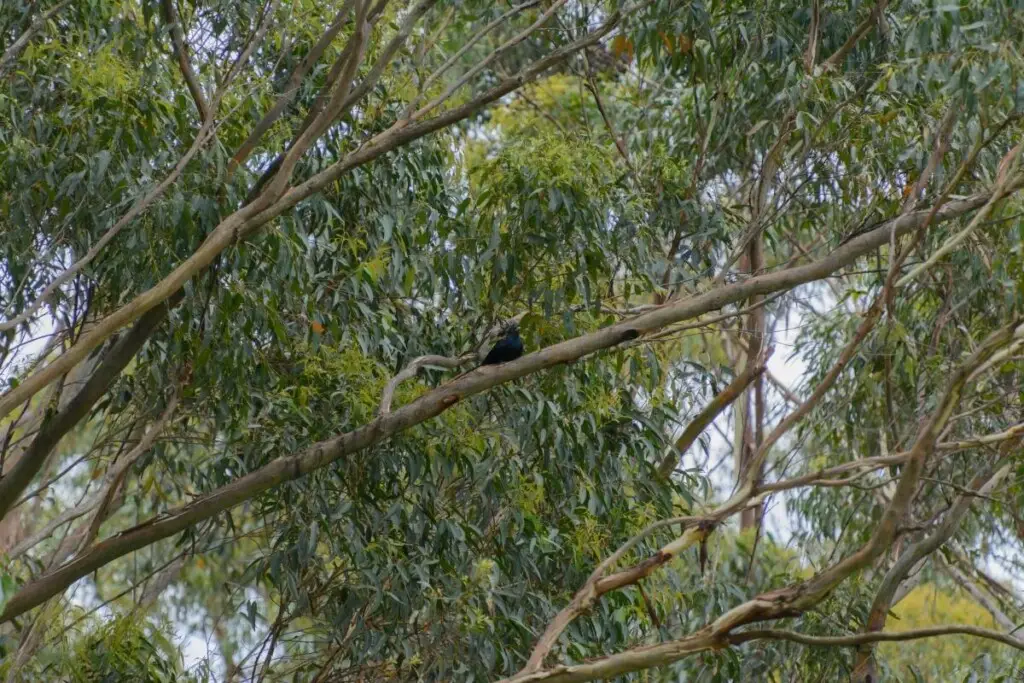
A camera set to auto mode cannot decipher exactly what you are trying to photograph in a scene like that. The bird is so small and sitting on a large limb of the tree. A camera set to auto mode will most likely focus on the leaves behind the bird.
Though it can be daunting for beginners to turn that mode dial away from auto, you must if you are to take better bird photos.
If you are not comfortable with manual mode, try using Shutter Priority mode (S on most cameras, Tv on Canons). This way, you can at least control the shutter speed and choose a different focus mode. (We will look at focus modes later in the post. Click here to go there now).
How much zoom do you need for bird photography? Find out in this article here on my blog.
2. Incorrect Shutter Speed
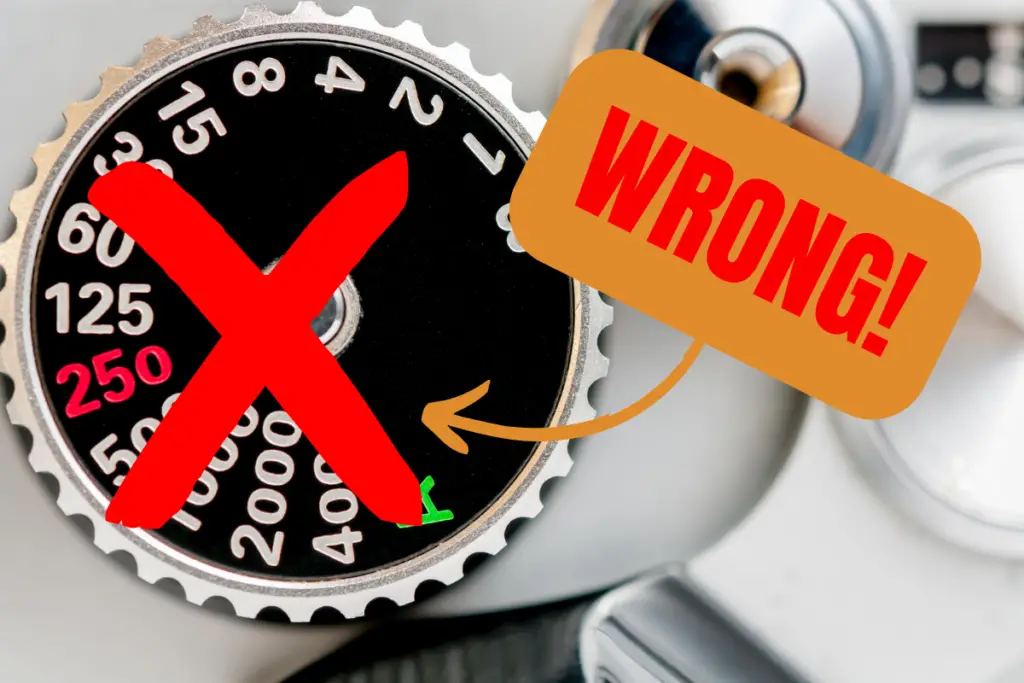
This is a common problem among beginner bird photographers. The answer to the question “why are my bird photos blurry?” is, more often than not, the wrong shutter speed.
Choosing the correct shutter speed for any particular shot is not a simple thing. Many factors affect shutter speed choice:
- Available light.
- Whether the subject is stationary or moving.
- How fast the subject is moving (if it is).
- Are you hand-holding the camera or is it on a tripod?
- The focal length of the lens you are using.
- The camera you are using.
- The result you want (ie. do you want blur in the image?).
The graphic below should give you a basic idea of the range to have your shutter speed in depending on the situation. These are simply guidelines based on what the bird is doing; they do not take into account the lighting conditions you are shooting in.
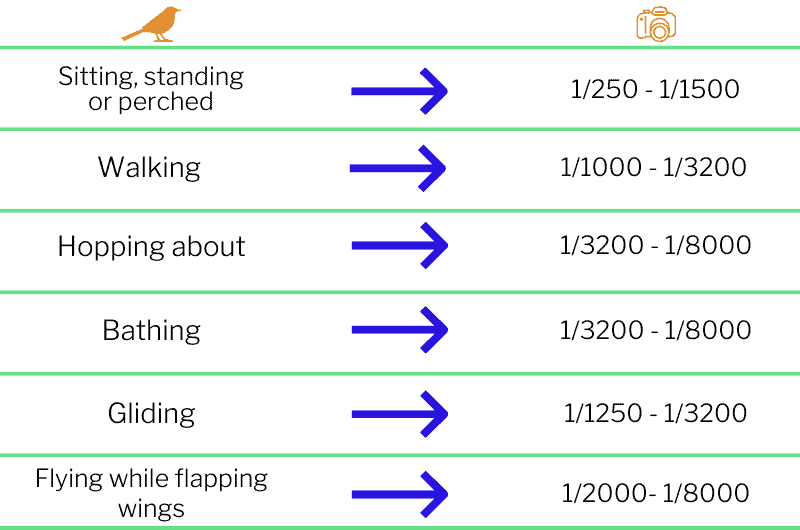
You should experiment with different shutter speeds to see the results in different situations. No amount of reading will beat getting out there and actually doing it.
Do you need a tripod for bird photography? Find out here in this article.
3. Incorrect ISO Value
If you are finding that your bird images are too dark or too bright, then ISO choice could be the problem. ISO is like a gain setting on your camera that will boost the amount of light coming into the camera.
ISO is affected by your other camera settings and they in turn are affected by the ISO. We will look into this later in the article. Skip to that part of the article by clicking here.
ISO will either make your photos too bright, too dark, or it will make them grainy. This is because it adds digital noise to the image when you use higher ISO settings.
The noise ISO creates in an image is not something to be too concerned about. You can remove this noise in programs such as Lightroom, Photoshop, or other photo editing apps.
Removing the noise does lower the sharpness of your images so this is why it’s a good idea to try and choose the lowest ISO value you can.
I am not going to suggest any ISO settings here as it is dependent upon your other camera settings. Go to the Incorrect Combination Of Camera Settings section of the article.
4. Incorrect Aperture Choice
Aperture is the opening within a camera lens that lets light into the camera’s sensor. It doesn’t just affect the amount of light getting in but also something called Depth Of Field.
The wrong aperture choice can result in an image that is too bright, too dark, or one that doesn’t have a lot of the scene in focus.
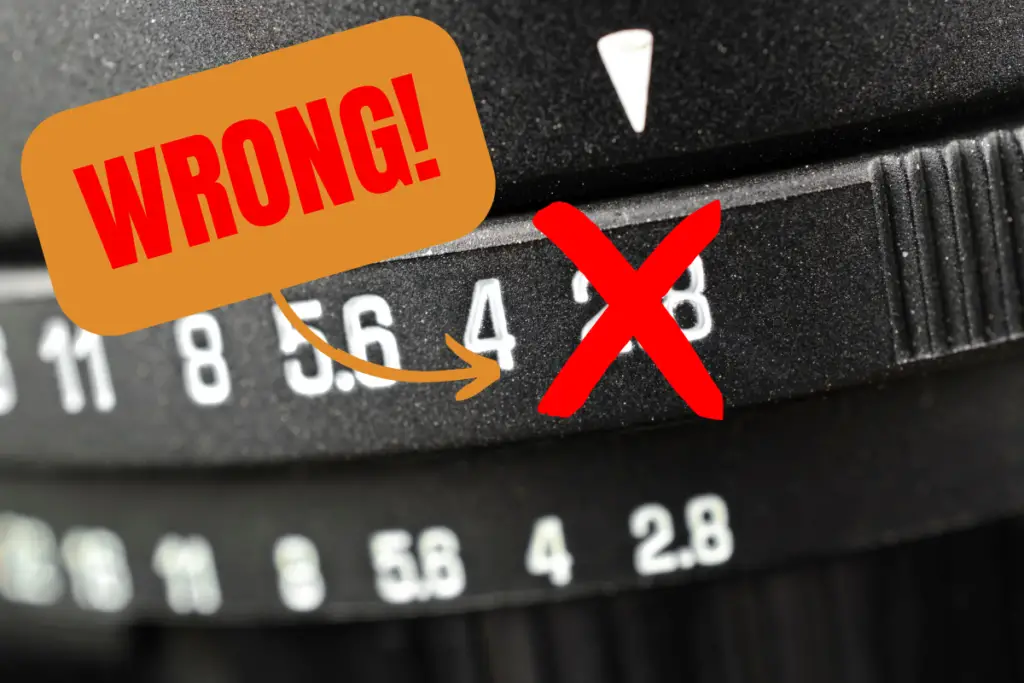
Take a look at the two images below:
The photo on the left was taken at an aperture of f/5.3 and the one on the right was taken at f/8.0. Notice how out of focus the background is in the image on the left. Conversely, the background in the image on the right is visible and almost in focus. This is the depth of field.
Choosing a wider aperture (smaller number) will in most cases produce a more out-of-focus background. This also depends on the focal length of the lens you’re using and your proximity to the bird. For a more in-depth look at aperture for bird photography, read this article here on my blog.
With most cheaper lenses, a wider aperture will result in a less sharp photo. If you are finding that your bird photos are slightly blurry, this could be the reason.
The aperture you choose depends on the following:
- how much light you have available.
- the depth of field you want in the photograph.
- your other camera settings.
- the lens you are using (each lens has a minimum and maximum aperture).
Getting closer to the bird or zooming in will also create a more blurry background, regardless of your aperture.
5. Incorrect Use Of Image Stabilization
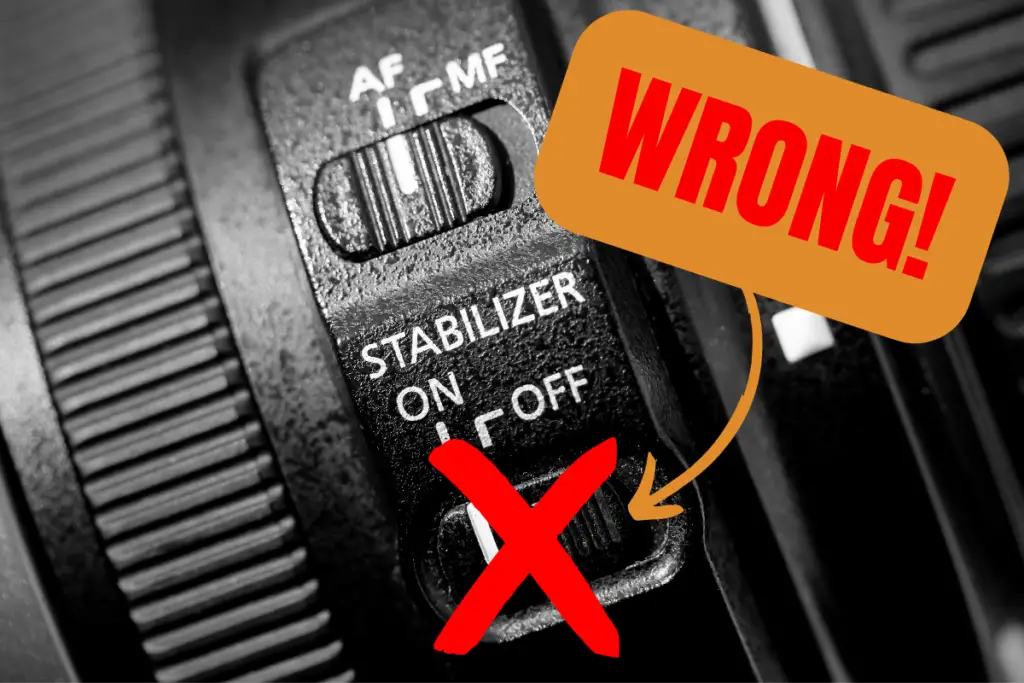
Image stabilization is great; it can help you to get better shots in low-light conditions when hand-holding your camera. This is one of the things it was designed for. One thing it was not designed for is birds in flight photography.
If you have been trying to photograph birds in flight and getting shots that aren’t quite in focus, it could be because of incorrect use of stabilization.
Image stabilization in camera lenses goes by different names. The table below lists some common lens brands and their naming of stabilization:
| Brand | Stabilization |
|---|---|
| Nikon | VR – Vibration Reduction |
| Canon | IS – Image Stabilization |
| Sony | OSS – Optical Steady Shot |
| Fuji | OIS – Optical Image Stabilization |
| Tamron | VC – Vibration Compensation |
| Sigma | OS – Optical Stabilization |
| Panasonic | OIS – Optical Image Stabilization |
| Tokina | VCM – Vibration Control Module |
Image stabilization can be helpful when you are photographing birds in low light conditions, as long as the birds are not moving. For birds in flight, turn off your image stabilization if possible.
6. Incorrect Focus Mode
The focus mode you choose is so important for good bird photography. If you are finding that your images are out of focus or that everything but the birds is in focus; this could be a focus mode problem.
The focus mode you choose depends on the situation and the surroundings. I find that Continous Autofocus is best to use for bird photography. This is the focus mode where your camera will continually try to achieve focus.
You can use Single-servo Autofocus for stationary birds if you like. This is where your camera achieves focus and then locks focus. In this mode, you will run into trouble if the bird decides to move, however.
With focus it is not just about choosing a mode either, you also have to select how many focus points you want the camera to use. The graphic below will give a few ideas about choosing focus points.
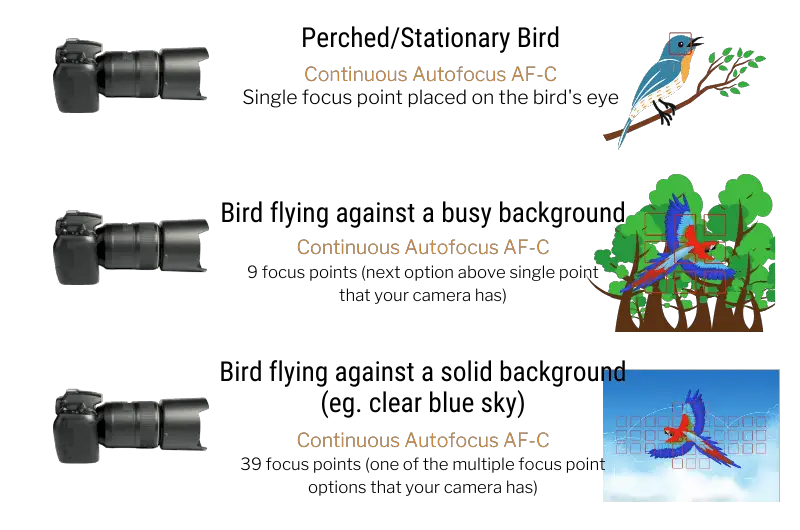
The subject of focus modes could fill up a whole article on its own and in fact, I did that! You can find more information in my What Focus Mode For Bird Photography? article.
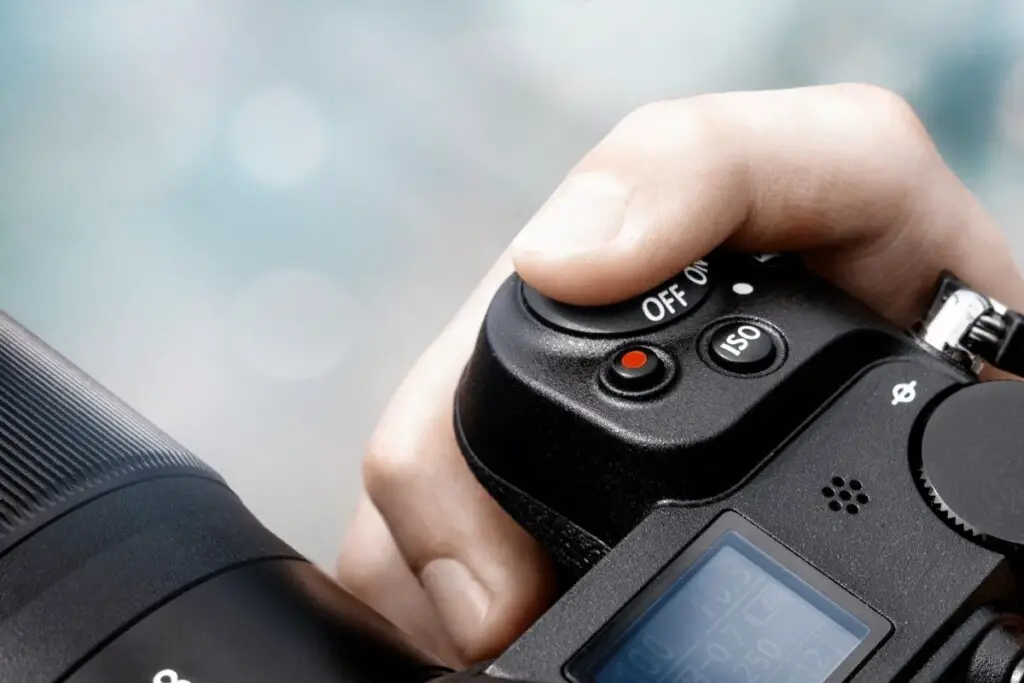
7. Incorrect Release Mode Choice

The release mode is the setting that controls how many times your camera’s shutter will activate when you press the shutter button. This can affect your bird photos too.
This is not super important to get right but it will affect how many good, sharp photos you end up taking.
If you currently have your camera set to single-frame release mode where it takes one shot at-a-time, you might consider changing it. If you switch to continuous release mode so the camera fires multiple times with each shutter button press, you will find that you get more sharp photos.
The reason for this is that continuous shutter release combats the camera shake caused by you moving the camera during shooting. It is simply the law of averages – if you take more shots at one time, you have more chance of getting a good one.
The act of pressing the shutter button moves the camera, even if only a little. If you only press it once but take multiple shots, you eliminate that extra movement.
8. Unsuitable Image Format

This has more of an effect when it comes to editing your images. It will however affect how your pictures look in-camera and unedited on your computer.
There will be two choices when it comes to the file format or image format in your camera. You can choose either JPEG or RAW. You may also be able to select both simultaneously.
JPEG is a compressed file format; your camera “squishes” the file by removing some information that it deems to be non-essential. You still end up with a great-looking photo but the file size is smaller and you won’t be able to edit it as extensively.
RAW is an uncompressed file format; the camera records all the information it gathers into the file. These file types are much larger but give you more freedom in editing.
If you want more control over the look of your bird photos when you edit them, I suggest using the RAW image format. In-camera mistakes such as over-exposure can be fixed in post-processing with RAW images. To learn more about this, read my RAW Vs JPEG For Bird Photography post.
9. Incorrect Combination Of Camera Settings
Back to ISO section of the article.
I saved the best for last. A lot of mistakes made by beginner photographers are due to incorrect combinations of camera settings that result in over or underexposed images. Getting this right is so important.
First off, I want to ask you to go easy on yourself when trying to get the hang of this – it is not easy! Take your time and experiment a LOT. Remember, it’s digital photography; we can take as many photos as we want!
Getting the “correct exposure” on an image is a three-way balancing act of aperture, shutter speed, and ISO settings. I put correct exposure in quotation marks as there is no such thing as correct exposure, only the right exposure for each situation and photographer.
Unfortunately, there is no magic formula here; no set-it-and-forget-it combination that will work for every bird in every lighting situation.
Rule: When you change one setting on your camera, in most cases, you will need to change one of the other two.
When changing your settings, you must watch the exposure indicator in the viewfinder or on the LCD screen.
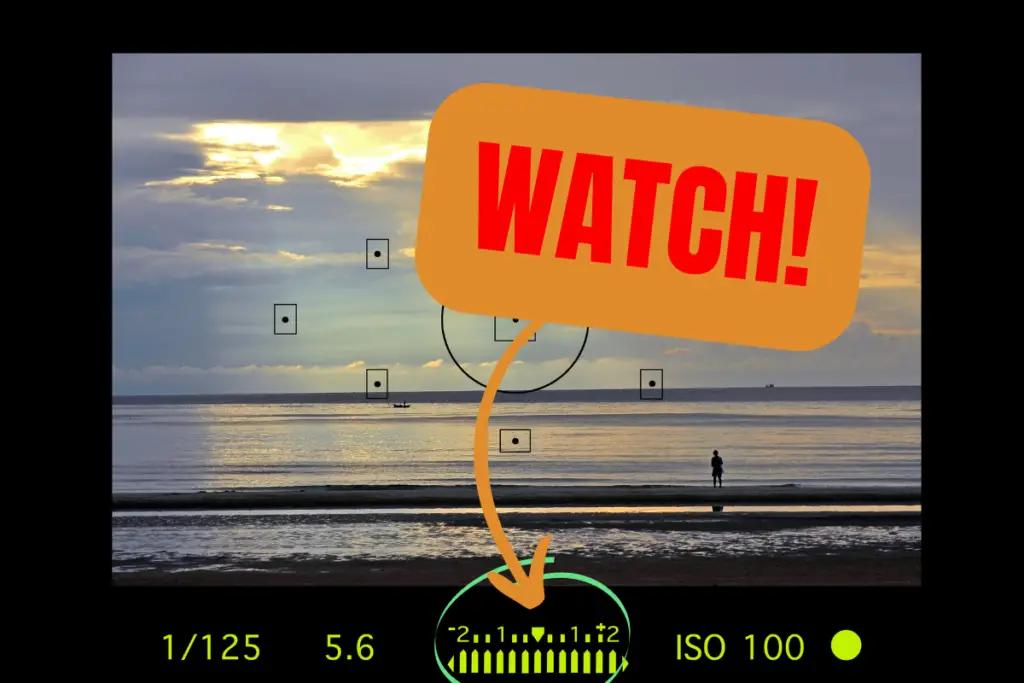
You want to keep the indicator as close to the middle as possible. If it moves towards the positive (+) numbers, you are overexposing. If it moves towards the negative (-) numbers, you are underexposing.
As I explained, your camera settings are situation-specific. Which shutter speed, aperture, and ISO you choose will depend on the lighting, the location, and the bird’s behavior.
Just remember the following things:
- Fast shutter speeds freeze motion.
- Slow shutter speeds blur motion.
- The faster your shutter speed, the less time your camera’s sensor is exposed to light (raise your ISO or open your aperture to compensate).
- The slower your shutter speed, the more time your camera’s sensor is exposed to light (lower your ISO or close down your aperture to compensate).
- Wider apertures produce shallower depth of field.
- Smaller apertures produce deeper depth of field.
- The smaller the f stop number (ie. f/1.8), the wider your aperture opening.
- The larger the f stop number (ie. f/32), the smaller your aperture opening.
- Opening your aperture lets more light in (choose a faster shutter speed or lower your ISO to compensate).
- Closing your aperture lets less light in (choose a slower shutter speed or raise your ISO to compensate).
- If you are shooting in low light, you will need to do one or more of the following: raise your ISO, open your aperture, or slow your shutter speed.
- If you are shooting in full sun, you will need to do one or more of the following: lower your ISO, close your aperture, or quicken your shutter speed.
- Try to choose the lowest ISO value that you can in all situations.
If you can remember the above things, you should get a head start to become a better bird photographer. As I said earlier, no amount of reading will beat getting out there and actually doing it. Don’t be afraid to make mistakes – that is how we learn.